How to Clear Facebook Cache
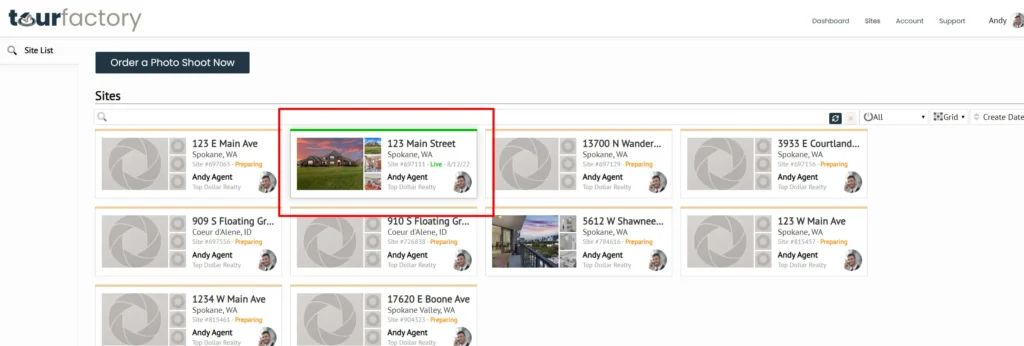
Step 1: Go to the Property site
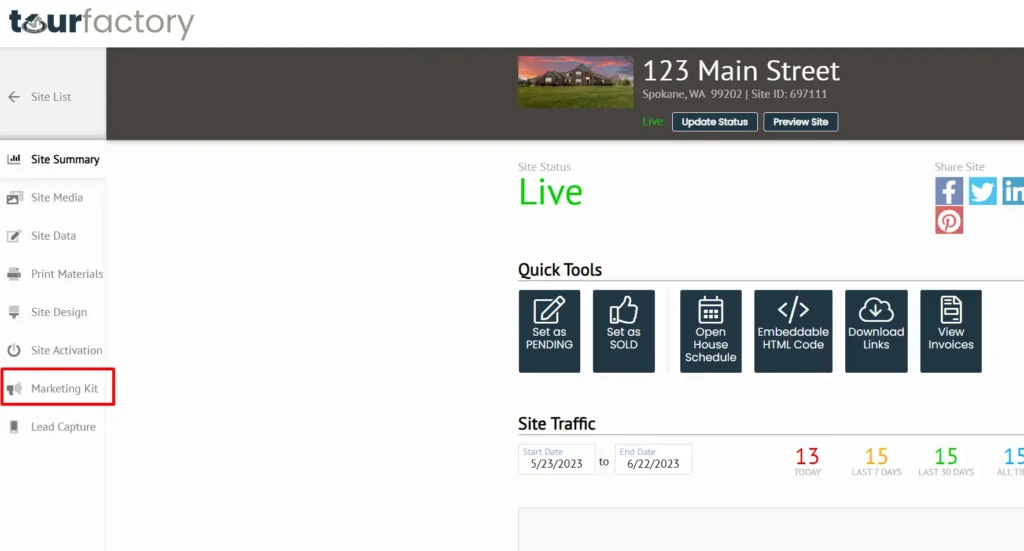
Step 2: Click on the Marketing Kit tab on the left
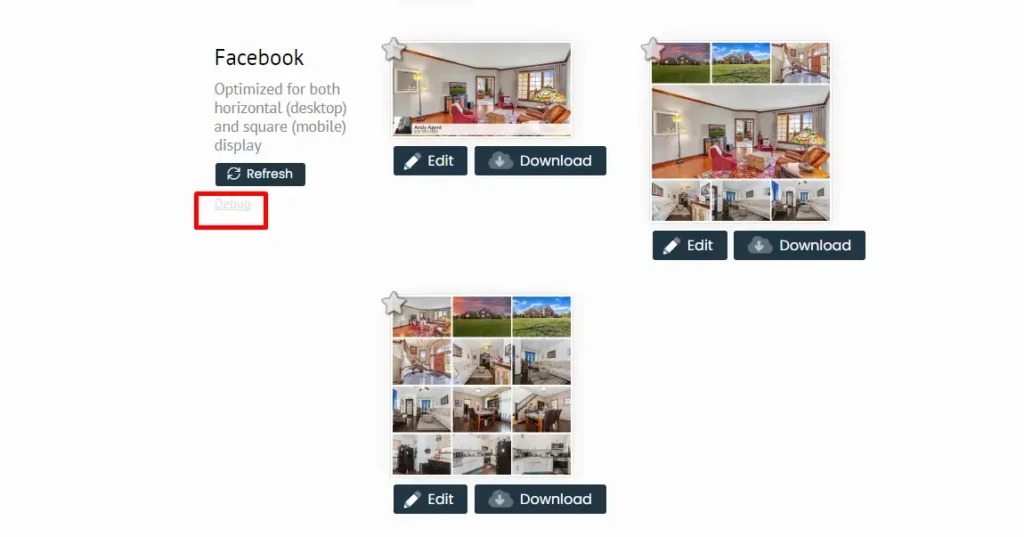
Step 3: Scroll down to the Facebook Social Media Flyer Tiles and click “debug”
Step 4: Click “Debug” again on the Facebook for Developers page that opens
Step 5: See updated information on new Facebook post
View the video below for a quick how-to overview:
Step-by-Step:
Step 1: Go to the property site that is having issues when posting to Facebook.

Step 2: Click on the Marketing Kit tab on the left-hand side of the page.

Step 3: Scroll down to the Social Media Flyer Tiles section and locate the Facebook tiles. Click the “debug” hyperlink just below the Refresh button.

Step 4: This will take you to the Facebook for Developers page where you will see the property site link. Click “Debug” to the right of the property site link.

Step 5: Once you have debugged the link, start a new Facebook post and see the updated information.
Note: a new post must be generated, the previously shared Facebook post cannot be edited.


