Step 3: Scroll to Floor Plans section and click on uploaded floor plan
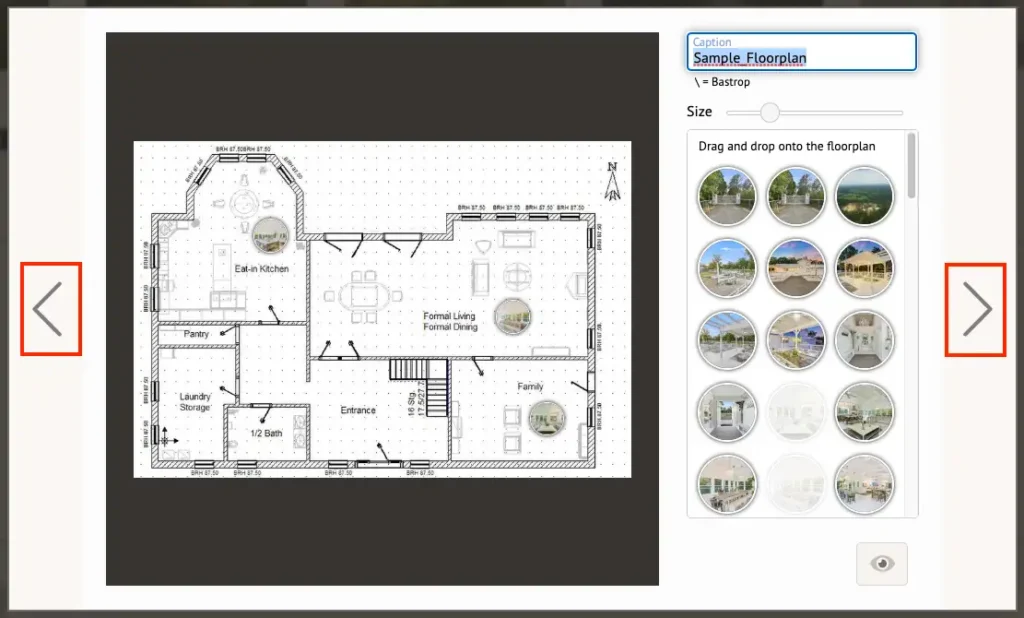
Step 4: Drag/drop hot spots onto floor plan
Step 5: Use the size scale to adjust the hot spot size
Step 6: Click either arrow button when finished
View the video below for a quick how-to overview:
Step-by-Step:
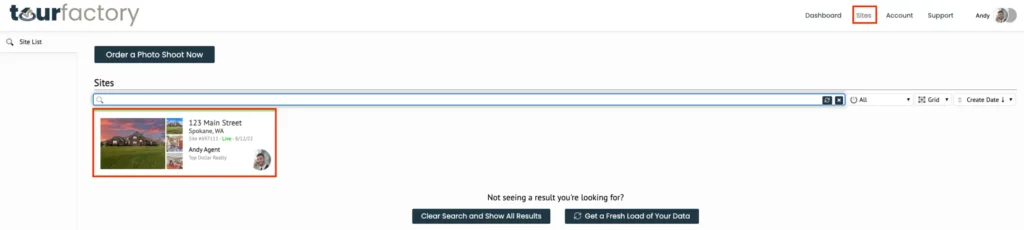
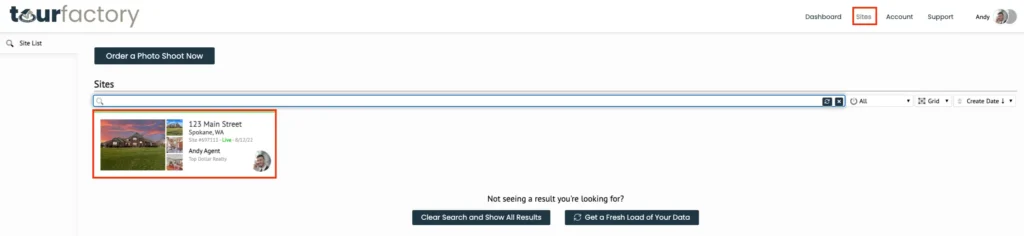
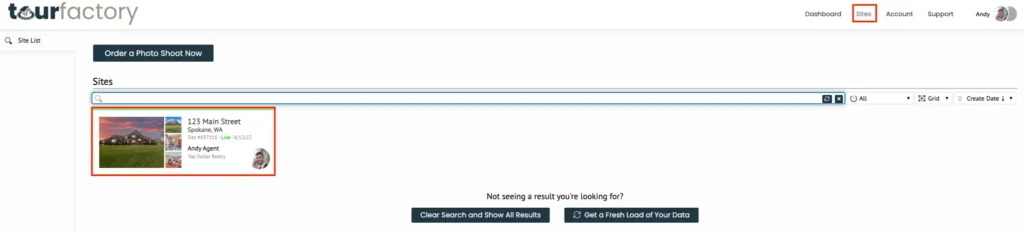
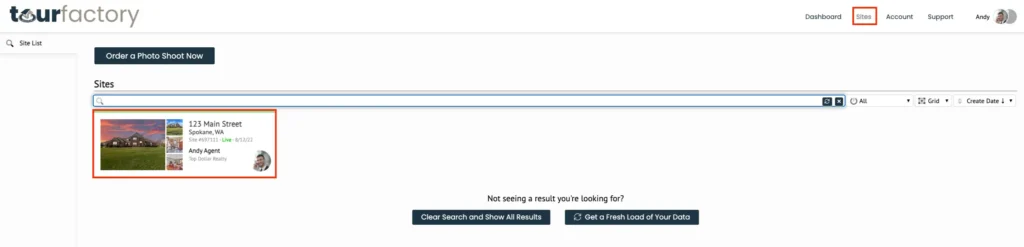
Step 1: From the Sites tab at the top of the page, click the property that you would like to create floor plan hot spots for. This will take you to the Site Summary page.
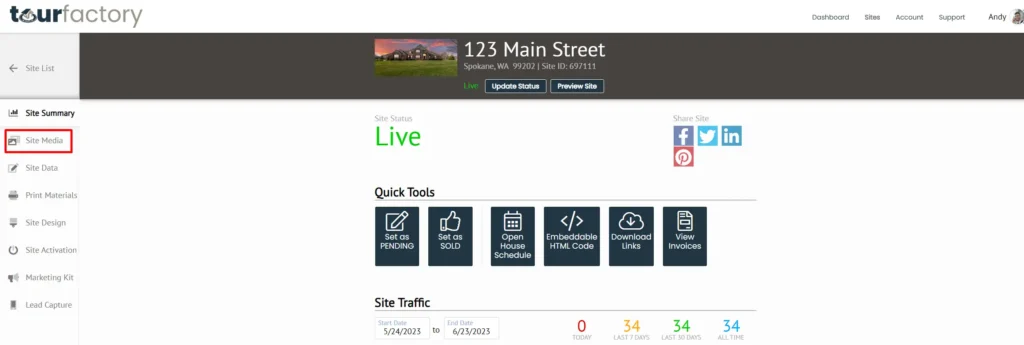
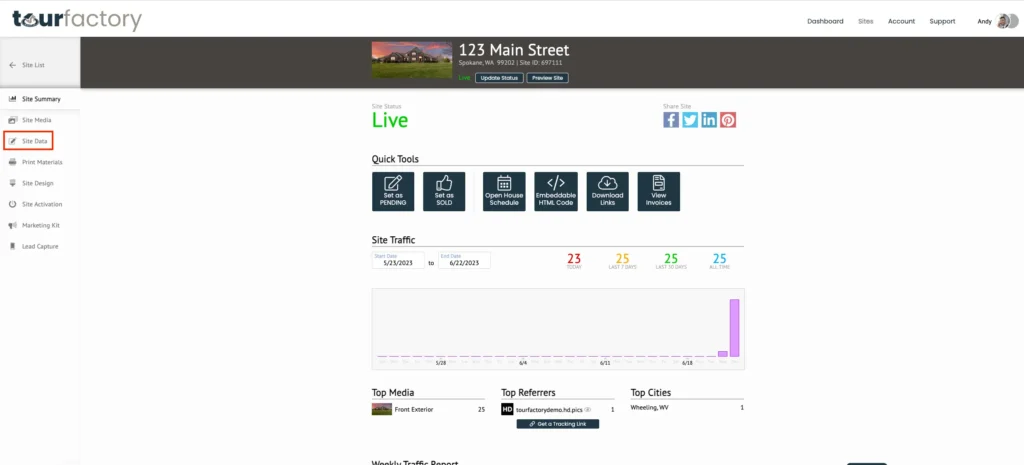
Step 2: Click the Site Media tab on the left-hand side.
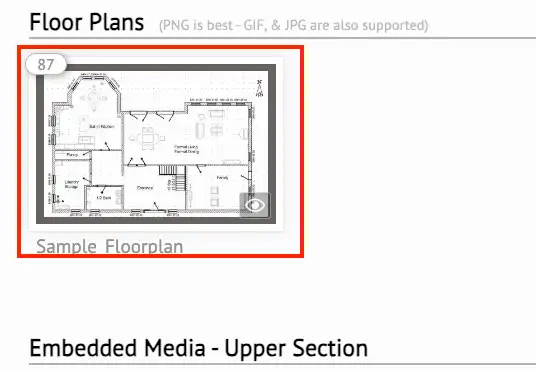
Step 3: Scroll to the Floor Plans section and click on the desired floor plan.
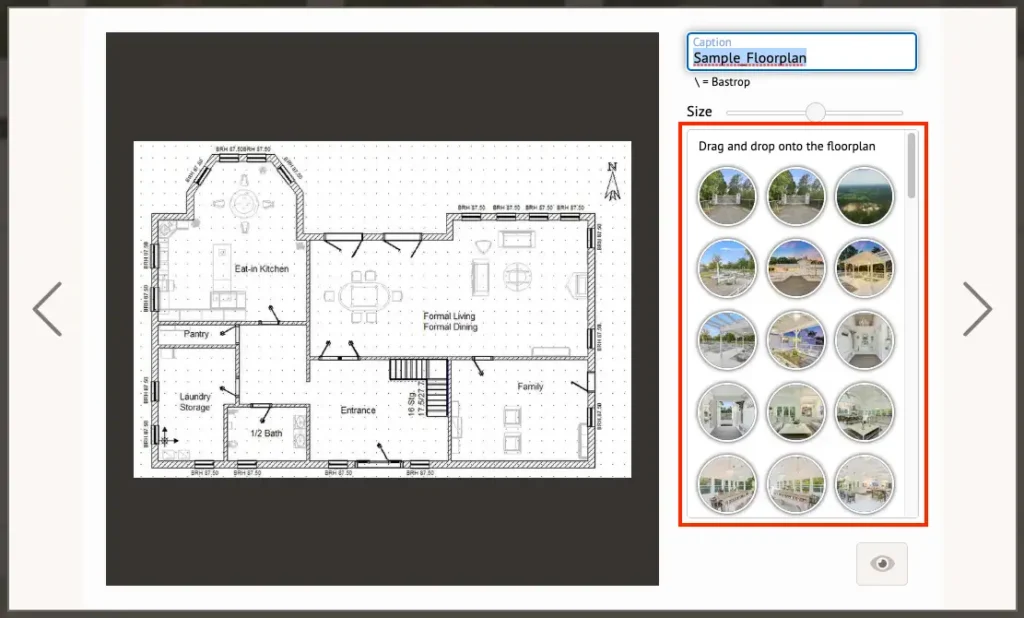
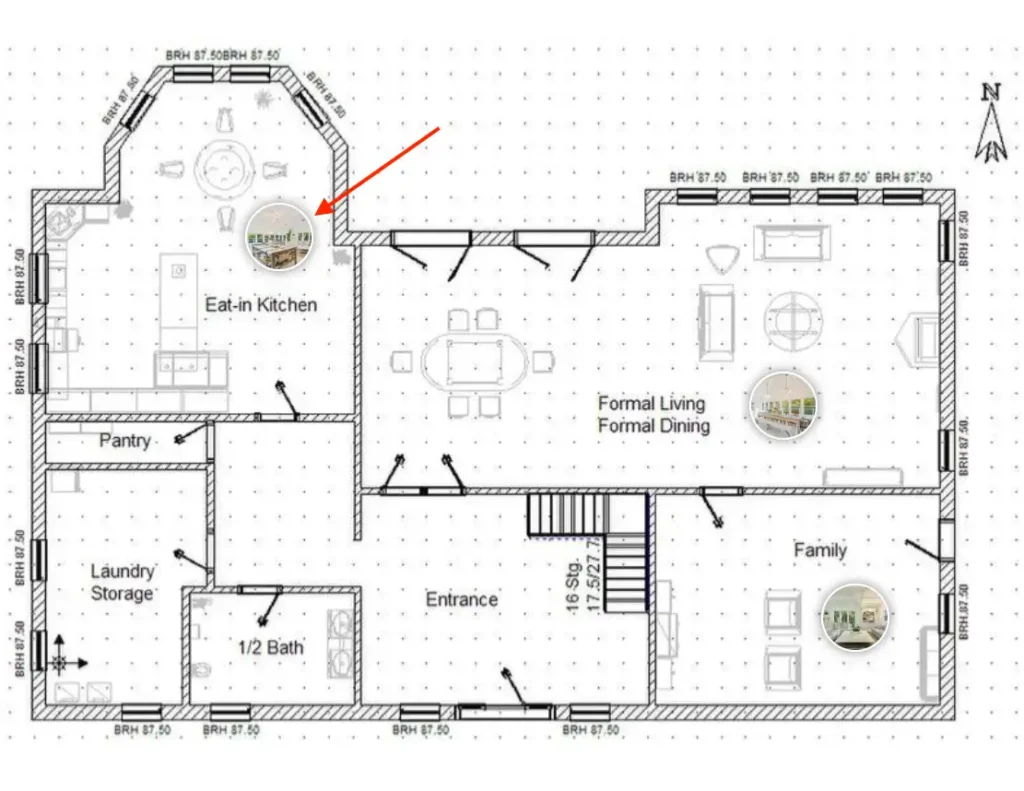
Step 4: Use the photo bar on the right-hand side to drag/drop hot spots to appropriate locations on the floor plan.
Step 5: Use the size scale bar to adjust the size of the hot spot buttons.
Step 6: Click either arrow button when finished to exit the edit screen. Your interactive floor plan will now be visible on your Property Site under the Photo Gallery section.
Note: when potential buyers view the floor plan on your property site, they can click the hot spots to view the image larger.
Related Content
Add a Display Condition
Property Site
How to Add a Display Condition Step 1: Go to the Site Summary Step 2: Click the Site Design tab Step 3: Select ‘Add A Display Condition’ Step 4: Choose…
How to Add/Change Music for your Property Site: Step 1: Go to Site Summary Step 2: Click the Site Design tab Step 3: Click ‘Select Background Music’ button Step 4:…
Step 1: From the Sites tab at the top of the page, click the property that you would like to download the floor plans for. This will take you to the Site Summary page.
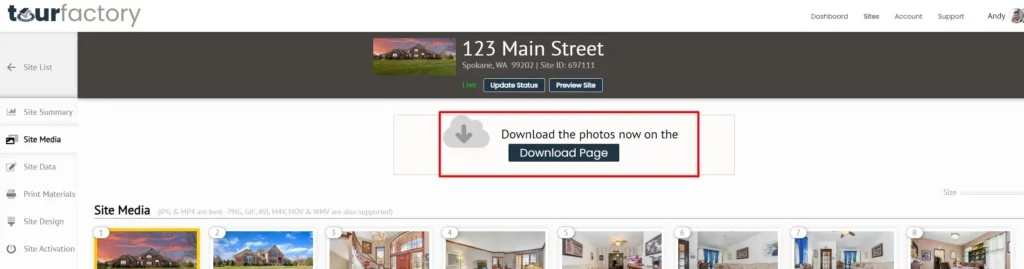
Step 2: From the Site Summary page, navigate to the Site Media tab on the left-hand side.
Step 3: On the Site Media page, all uploaded photos, floor plans, site attachments, and embedded media will display. To download floor plans, click the ‘Download Page’ button at the top of the page.
Step 4: Scroll down to the bottom of the download page to view the site’s floor plans. You may download your floor plans one of two ways:
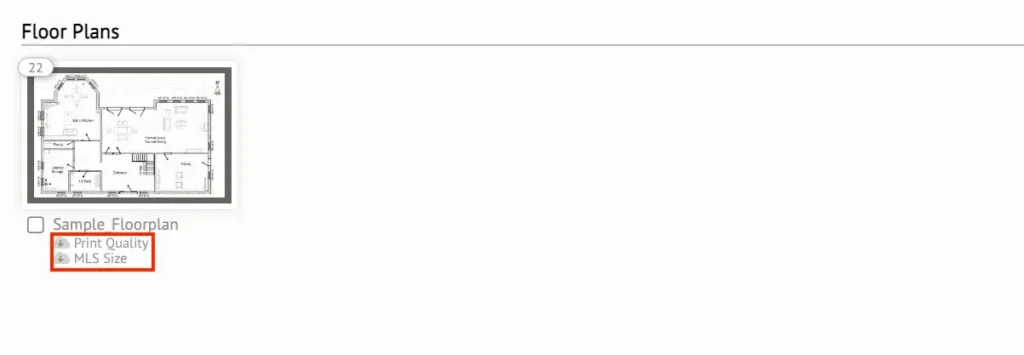
Individually Download Floor Plans
To download floor plans individually, click the size option under the image:
Print Quality – Original size, high-quality image
MLS Size – 1,200 pixel long edge; acceptable for majority of MLS sites
Note: floor plan will download as a .jpg image
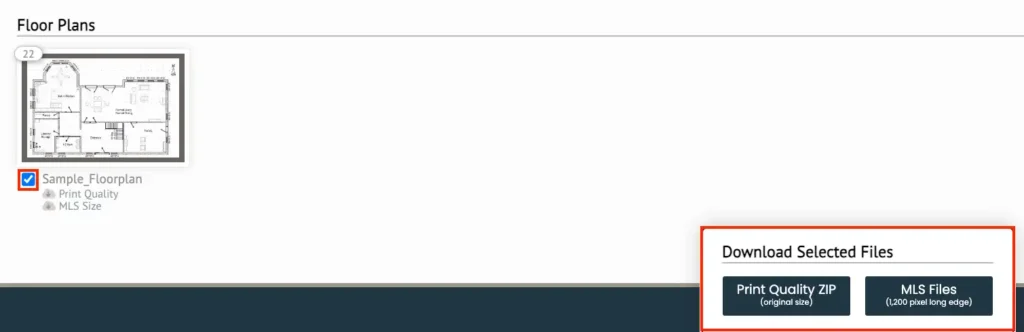
Only a Select Few Floor Plans
If you have multiple floor plans uploaded and do not wish to download all of them, you can download only a select few by checking the box under the desired floor plan and selecting the corresponding size button:
Print Quality Zip – Original size, high-quality image
MLS Files – 1,200 pixel long edge; acceptable for majority of MLS sites
Note: the floor plans will download as a .zip file, which will need to be extracted. See the article below for instructions on how to unzip the file.
Note: if it is not pinned to your taskbar, search ‘File Explorer’ using the magnifying glass icon next to the Start Menu.
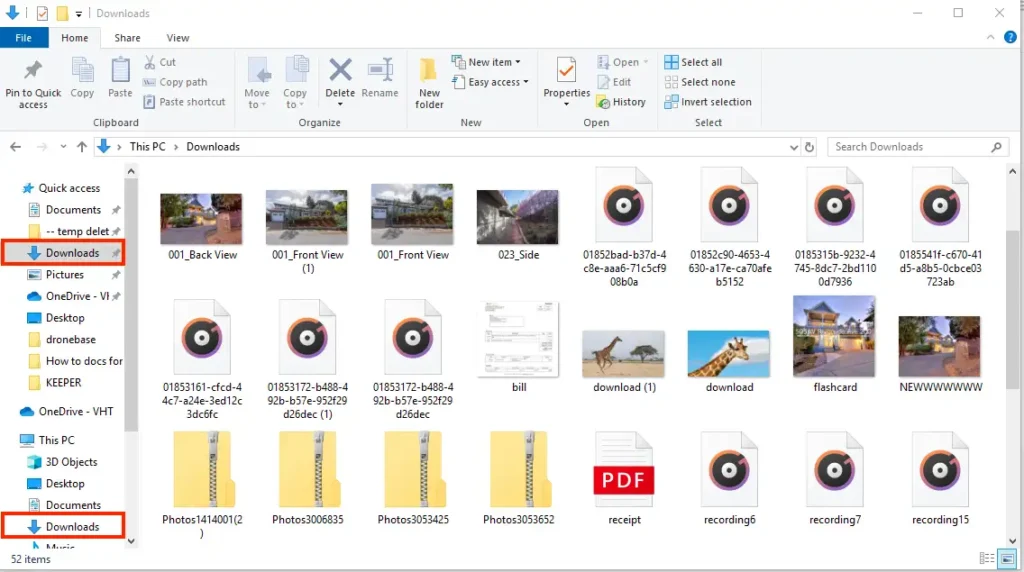
Step 2: Navigate to ‘Downloads’ on the left-hand side.
Note: if ‘Downloads’ is not present in your Quick Access section, it will be listed under This PC section.
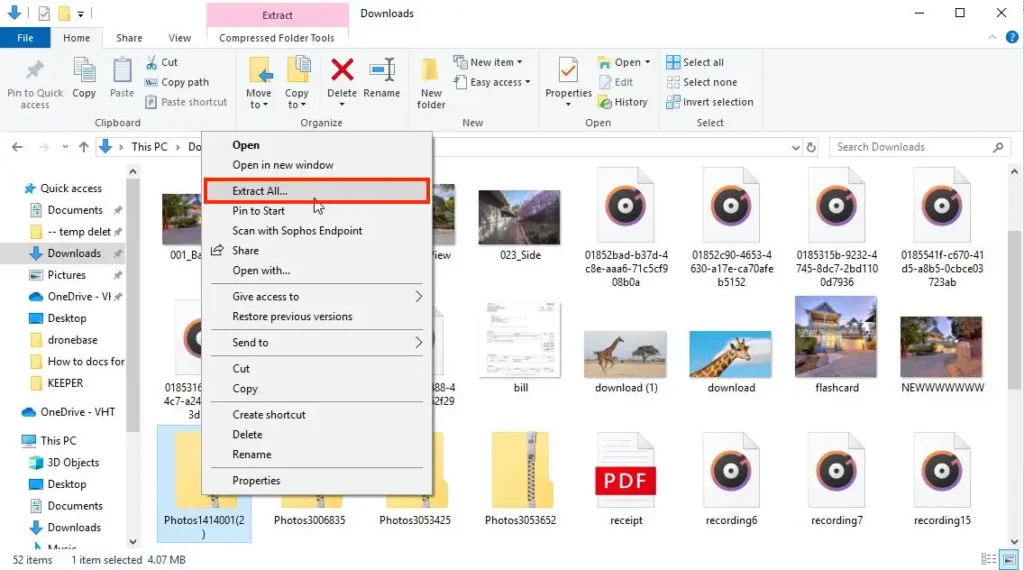
Step 3: Locate the .zip file download, right-click and select ‘Extract All…’
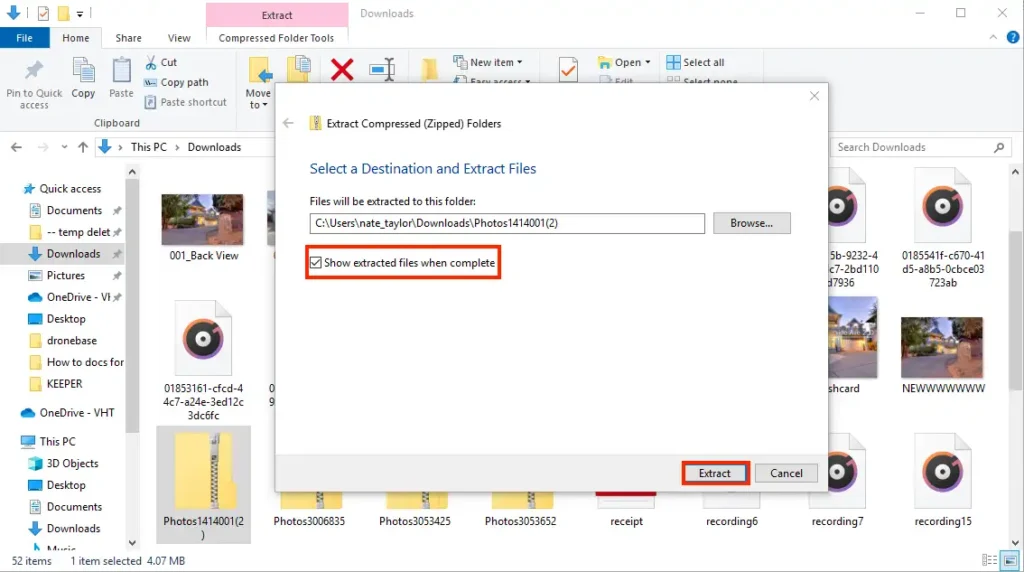
Step 4: On the pop-up screen, make sure ‘Show extracted files when complete’ box is checked, and click ‘Extract’.
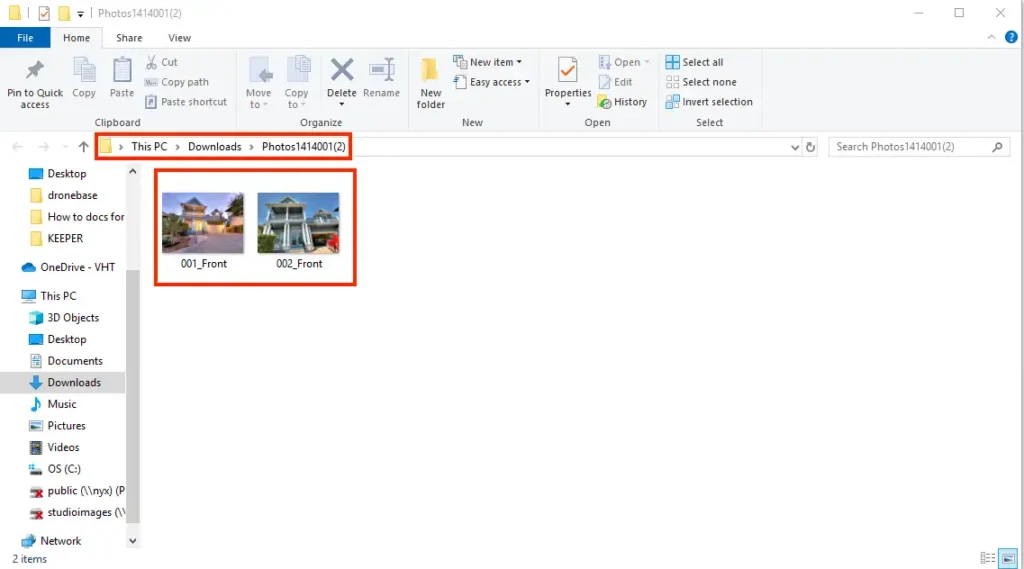
Step 5: A new folder will be created in Downloads with your photos; you are now able to select/edit as needed.
How to Unzip a Zip File on Mac:
Step 1: Open your ‘Finder’ folder
Note: if it is not present on your Dock, use the Menu Bar magnifying glass in the top right-hand corner to search ‘Finder’.
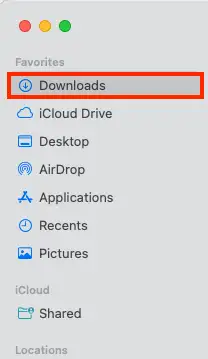
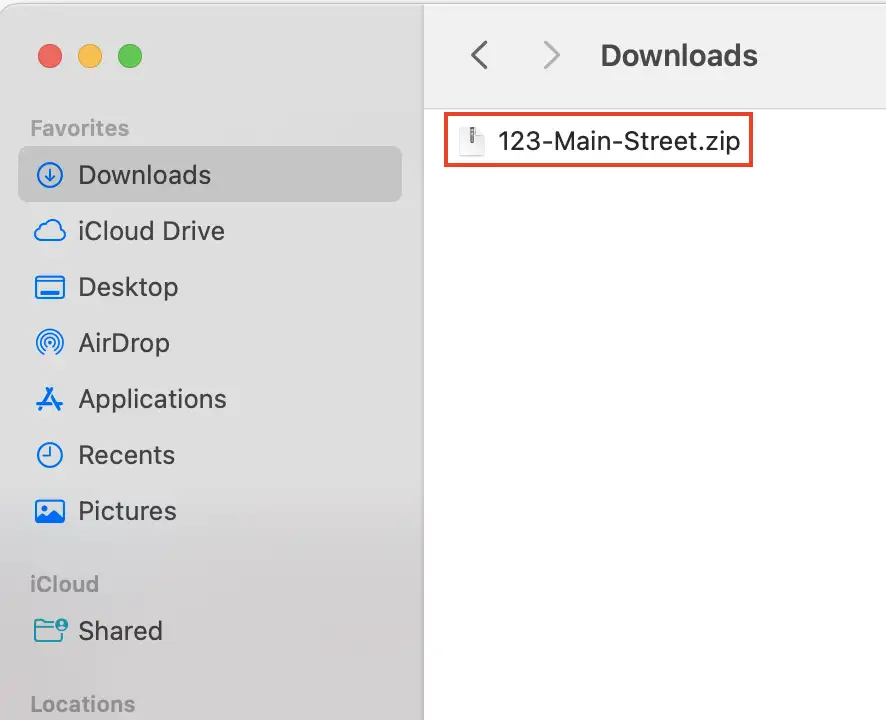
Step 2: Navigate to ‘Downloads’ in Sidebar on the left-hand side.
Note: if it is not pinned in your Sidebar Favorites, search ‘Downloads’ using the magnifying glass on the top right-hand side of the Finder folder.
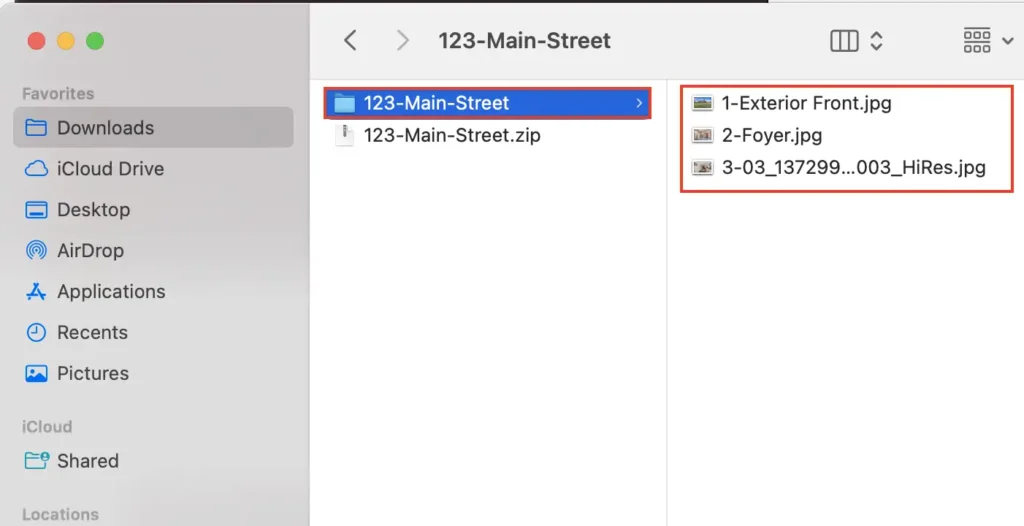
Step 3: Locate the .zip file and double-click to unzip the download.
Step 4: This will automatically create a new folder with the .zip file name; your photos will be available inside to select/edit as needed.
Related Content
Add a Display Condition
Property Site
How to Add a Display Condition Step 1: Go to the Site Summary Step 2: Click the Site Design tab Step 3: Select ‘Add A Display Condition’ Step 4: Choose…
How to Add/Change Music for your Property Site: Step 1: Go to Site Summary Step 2: Click the Site Design tab Step 3: Click ‘Select Background Music’ button Step 4:…
Step 2: Use the Quick Tools to change status to Pending or Sold
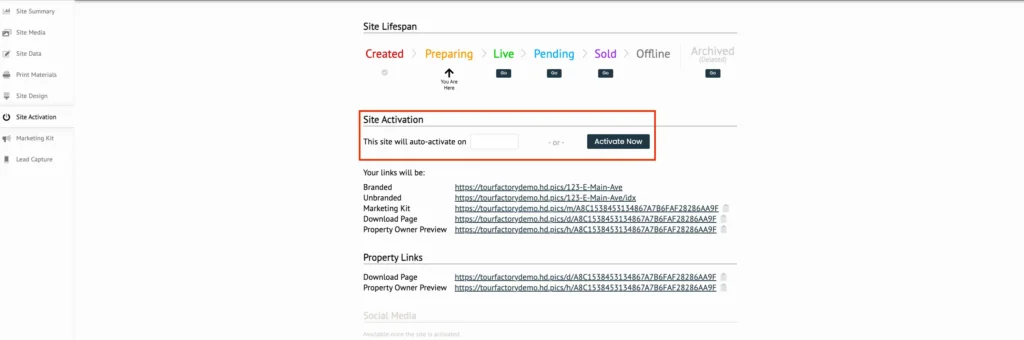
Step 3: For more options or to change the Privacy, click ‘Update Status’ or click on the Site Activation tab
Step 4: Use the Site Activation section, if needed
Step 5: Click the ‘Go’ button below the desired status to update
View the video below for a quick how-to overview:
Step-by-Step:
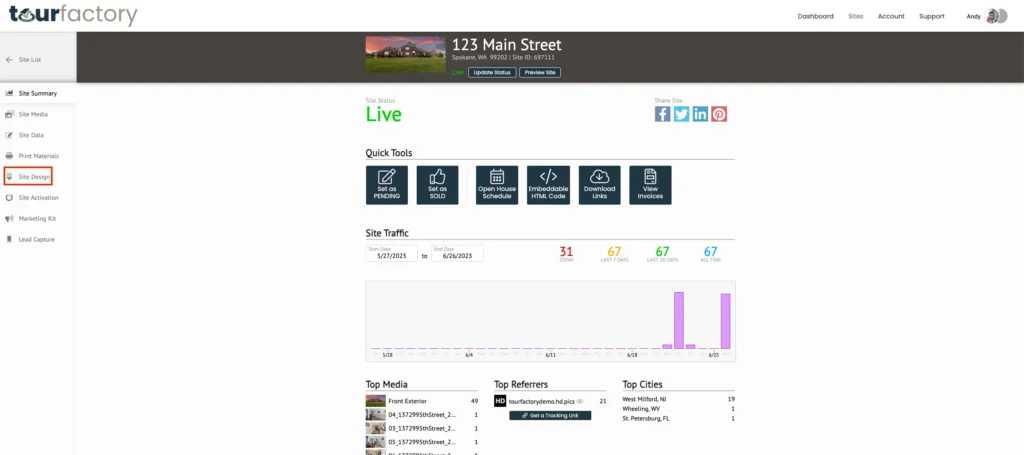
Step 1: From the Sites tab at the top of the page, click the property that you would like to update the status or privacy for. This will take you to the Site Summary page.
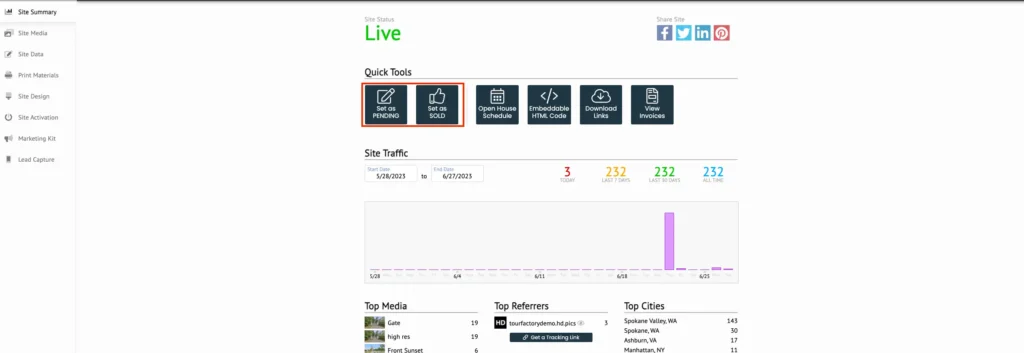
Step 2: Use the Quick Tools section to change your status to Pending or Sold. You will also be able to use this section to reset the site as Active if you need to change the listing back from Pending or Sold.
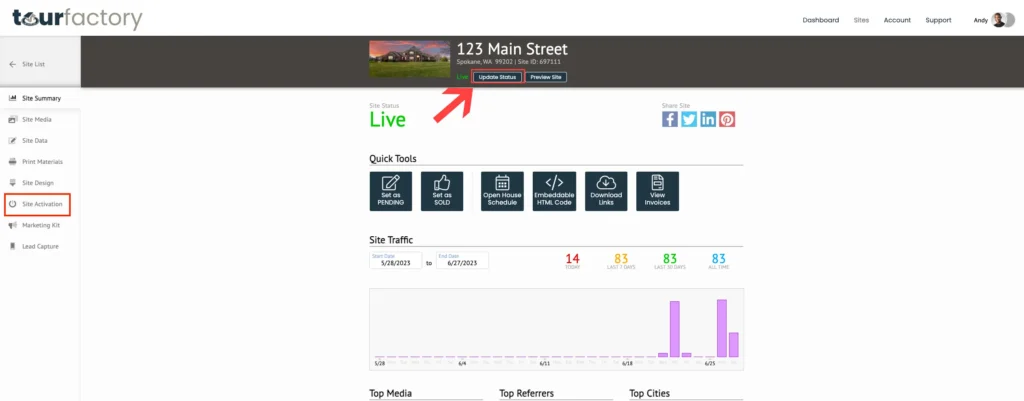
Step 3: For more options or to update the site’s privacy, click on the ‘Update Status’ button under the address header or on the Site Activation tab on the left-hand side. Note: use the Site Activation tab to do the initial activation for your site, if not done automatically.
Step 4: If your site has not been activated, use the ‘Site Activation’ section to set an activation date or click the ‘Activate Now’ button.
Step 5: If your site has already been activated, in the Site Lifespan section, click the ‘Go’ button under the desired status to update.
Offline
Use this status as a Privacy setting to hide your Property Site until you are ready to show off the listing.
Archived (Deleted)
Use this status to remove a site from your Dashboard. To view your Archived sites, sort the Sites tab by “Recently Archived”. Note: After 30 days, archived sites are unable to be viewed. Contact customer service to have a site restored.
Related Content
Add a Display Condition
Property Site
How to Add a Display Condition Step 1: Go to the Site Summary Step 2: Click the Site Design tab Step 3: Select ‘Add A Display Condition’ Step 4: Choose…
How to Add/Change Music for your Property Site: Step 1: Go to Site Summary Step 2: Click the Site Design tab Step 3: Click ‘Select Background Music’ button Step 4:…
Step 4: Select from provided media and listen to a sample
Step 5: Click on the sound wave image to hear additional sample, if needed
Step 6: Make song selection and click ‘OK’
Step 7: Use the ‘Surprise Me’ feature, if needed
Note: Adding music to your Property Site will also add music to your Site Videos.
See the Table of Contents on the right-hand side and click for Frequently Asked Questions.
View the video below for a quick how-to overview:
Step-by-Step:
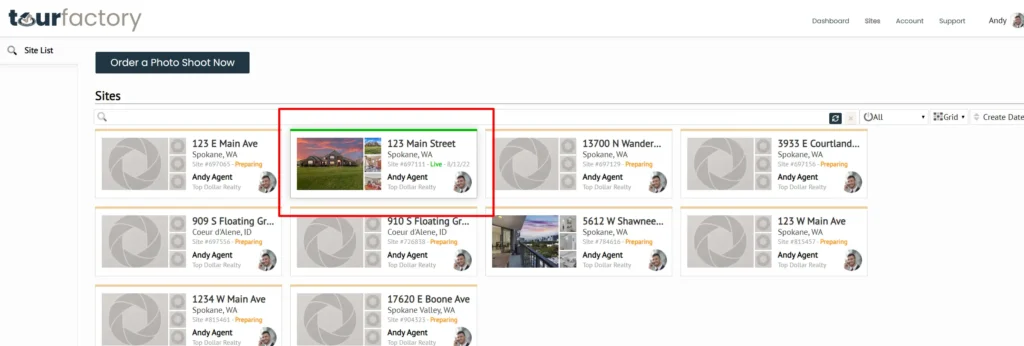
Step 1: From the Sites tab at the top of the page, click the property that you would like to add/change music for. This will take you to the Site Summary page.
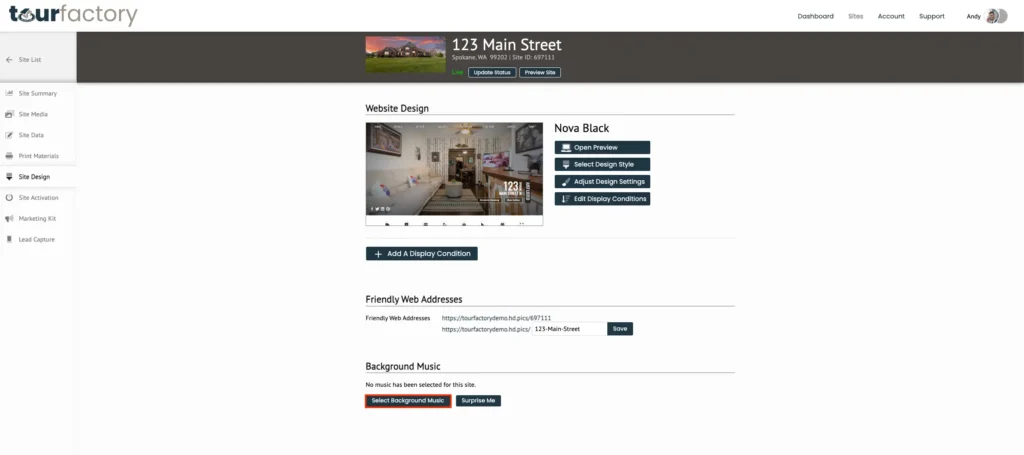
Step 2: Click the Site Design tab on the left-hand side.
Step 3: Under Background Music, click the ‘Select Background Music’ button to display your music choices.
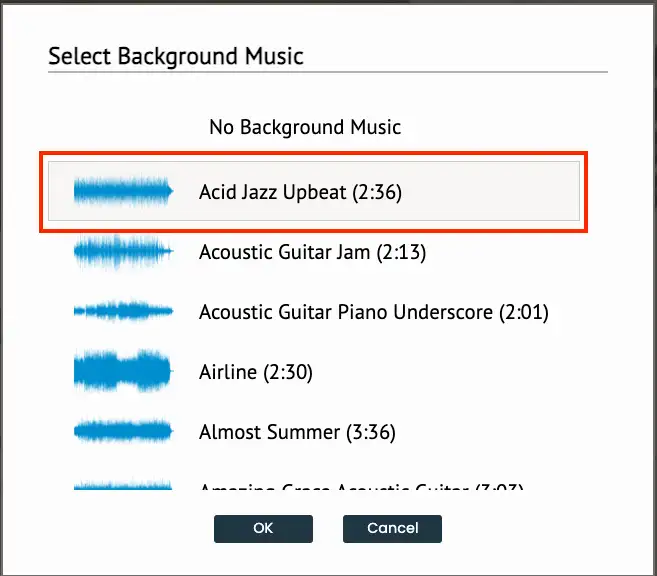
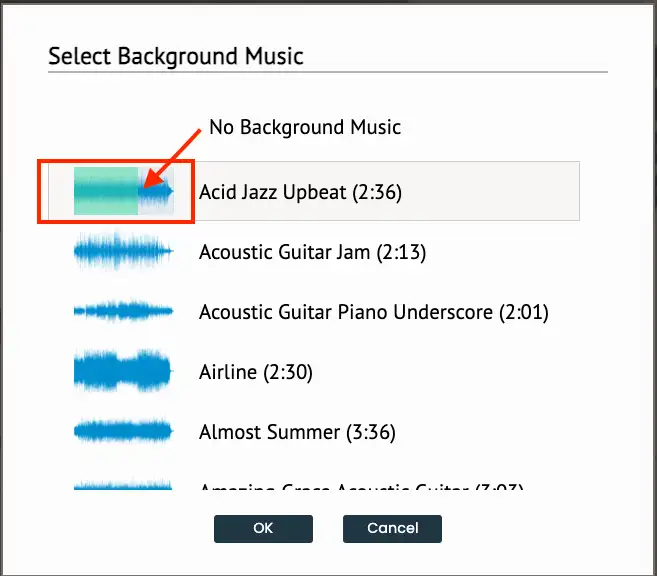
Step 4: In the pop-up box, scroll through the list of music selections and click on the name to listen to a sample.
Note: the selected song will have a border highlighting
Step 5: If you’d like, you may click on the music sound waves image to hear different sections of the song.
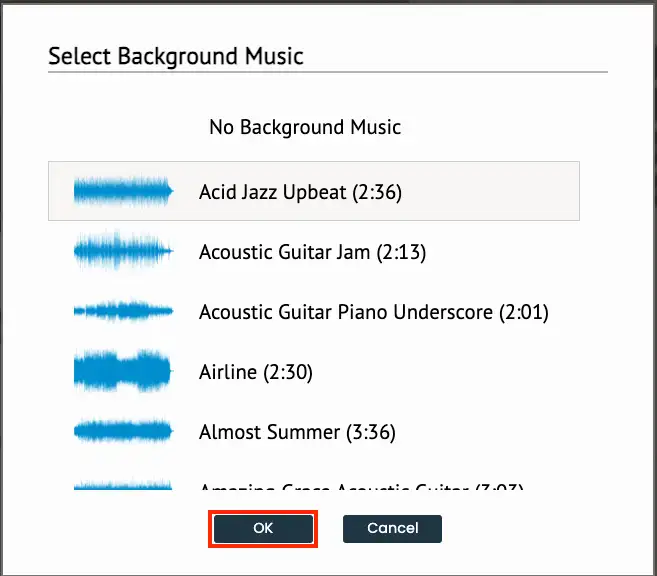
Step 6: Once you’ve selected your song, click ‘OK’.
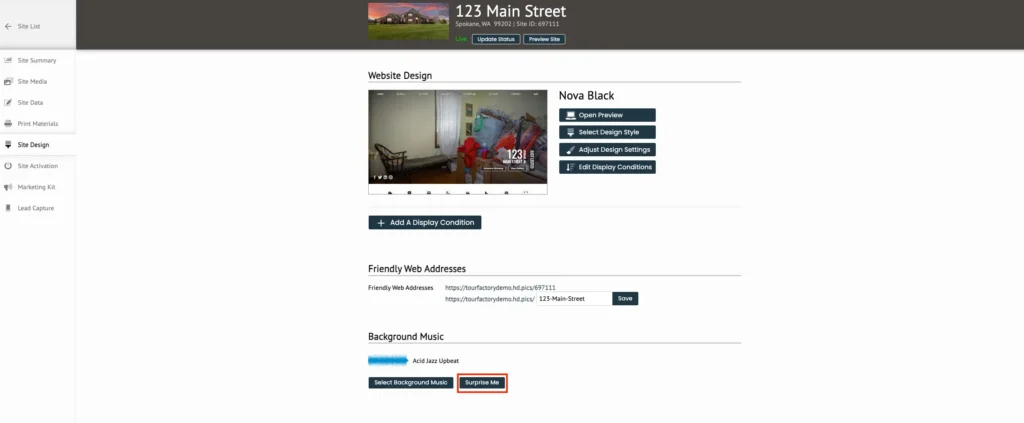
Step 7: If you’re not sure which song to select, you can click on the ‘Surprise Me’ button to get a randomized selection. The song will automatically start to play after clicking the button so you can hear the sample.
Adding Music FAQs
I’m having trouble picking a song from the list. What do you recommend?
We recommend “Happy Home” as the perfect song to add to any property site.
Can I upload my own music?
At this time, only the provided music is able to be used on Property Sites and Site Videos. The option to add your own music is not available.
Why did I get a copyright notice from YouTube?We have secured an Enterprise license with StoryBlocks so you can freely share your Property Sites and Site Videos without fear of copyright infringement. However, copyright claims occur on a regular basis, regardless of where the creator got their music. From time to time, automated systems at Facebook and Youtube can flag the site and/or videos. If you receive such a claim, please go ahead and dispute the claim based on the steps provided in the copyright claim notice. You can view the full licensing agreement by clicking here.
Related Content
Add a Display Condition
Property Site
How to Add a Display Condition Step 1: Go to the Site Summary Step 2: Click the Site Design tab Step 3: Select ‘Add A Display Condition’ Step 4: Choose…
Note: To learn how to add a display condition, check out our article here.
View the video below for a quick how-to overview:
Step-by-Step:
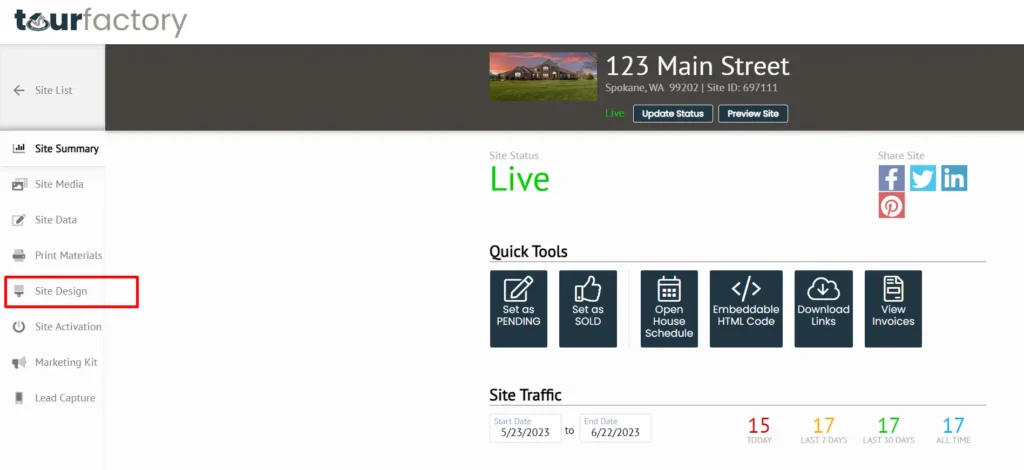
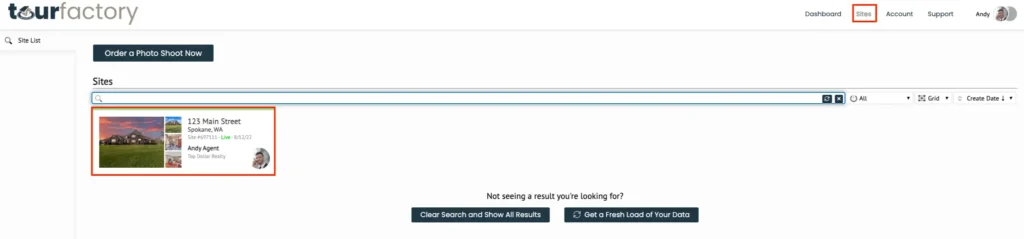
Step 1: From the Sites tab at the top of the page, click on the property that you would like to change the Site Design for. This will take you to the Site Summary page.
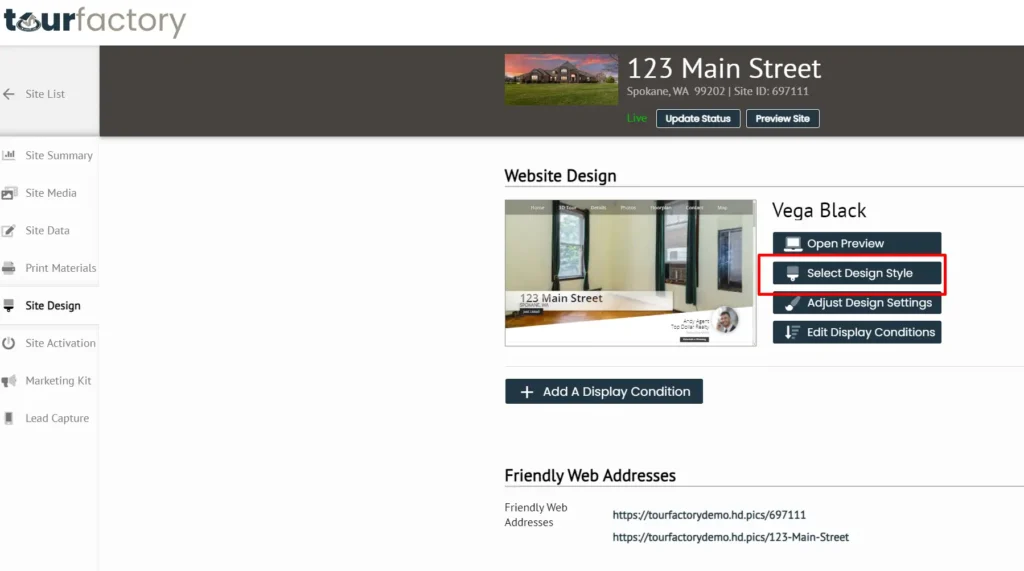
Step 2: Click the Site Design tab on the left-hand side of the page.
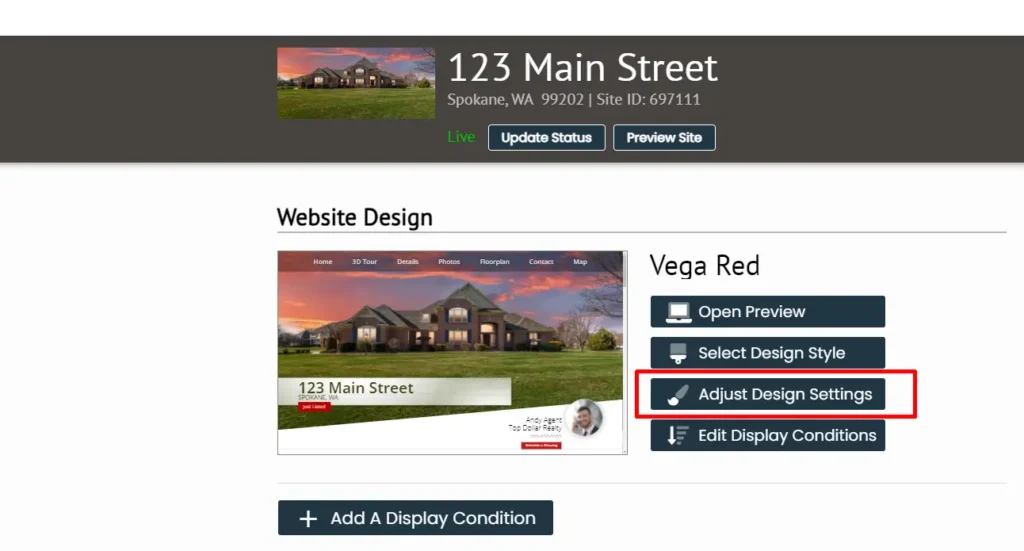
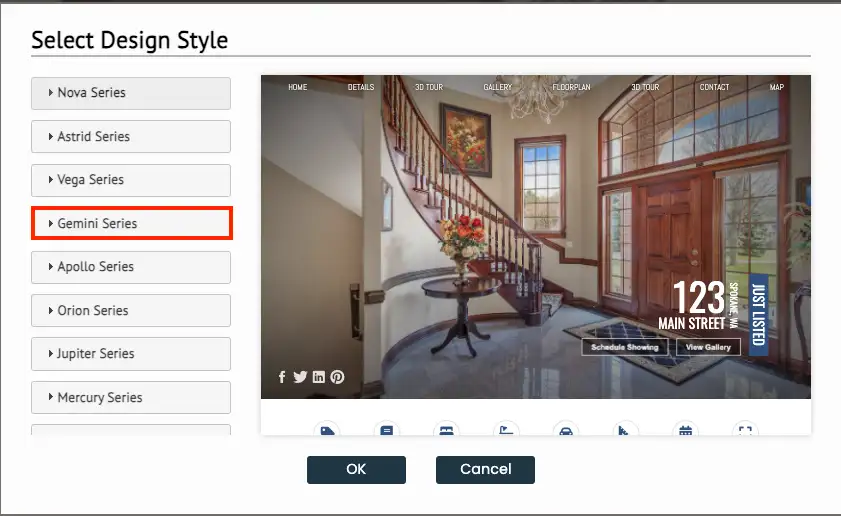
Step 3: In the Website Design section, click the ‘Select Design Style’ button.
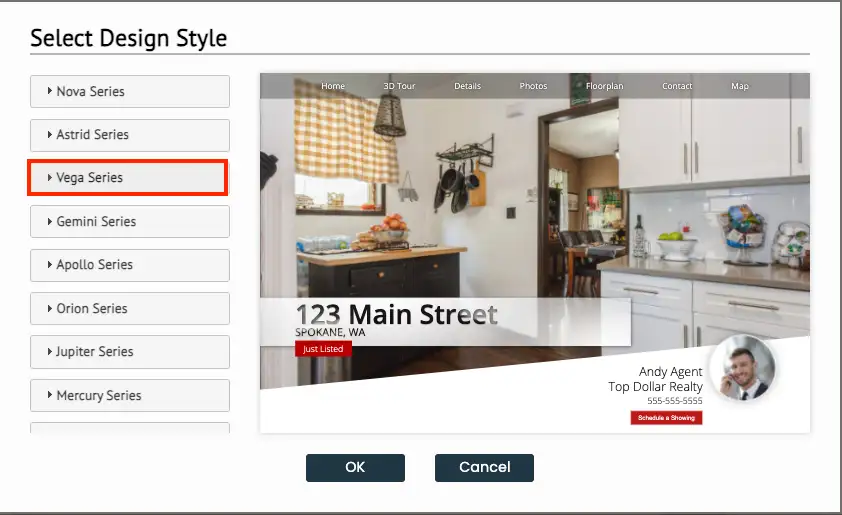
Step 4: On the left-hand side, choose the Design Style Series that you would like to use for the property site.
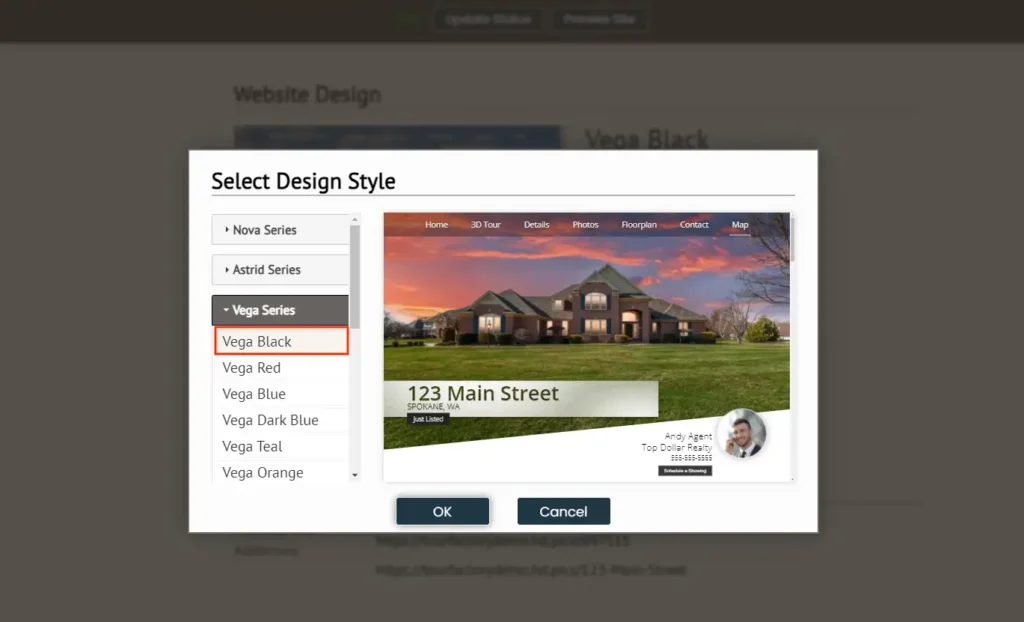
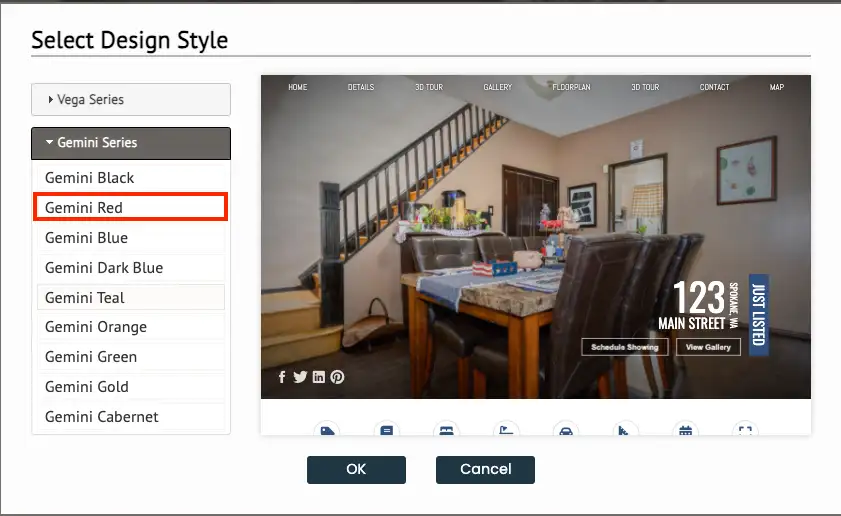
Step 5: In the drop-down menu that appears, select the Series color that you would like to use. Clicking on a series color will give you a preview of what the site will look like with that color selected.
Note: you can scroll down in the preview box to view the whole site in the selected color.
Step 6: Once you have chosen your series and color, click the ‘Ok’ button.
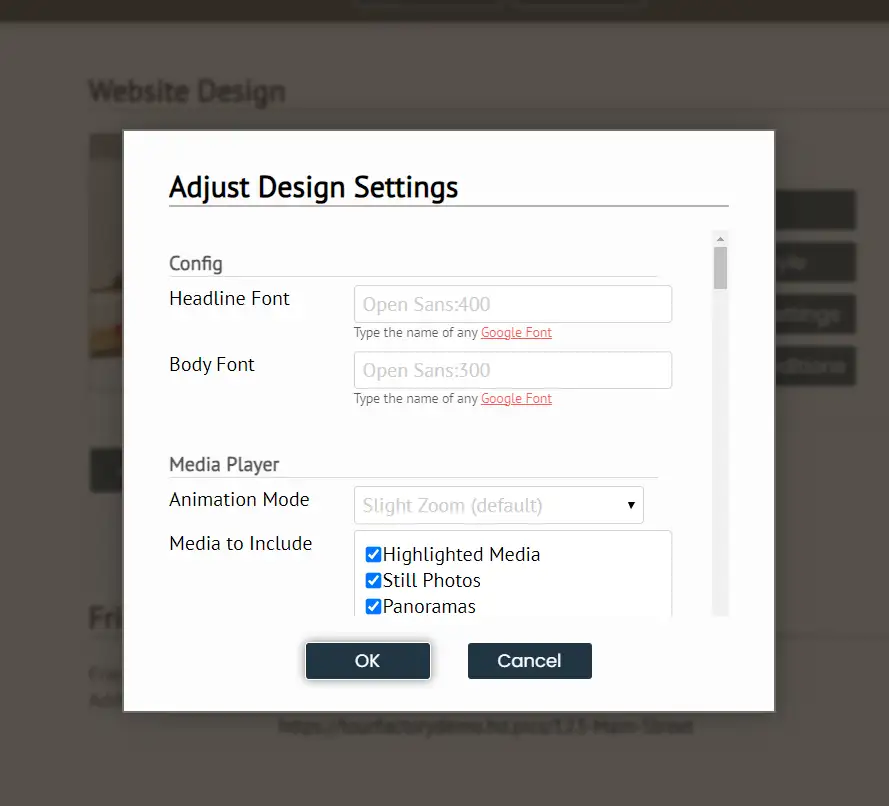
Step 7: If you click ‘Adjust Design Settings’, you can make changes to certain items of the site design.
Step 8: Make any necessary changes such as fonts, navigation names, or the speed of the photos.
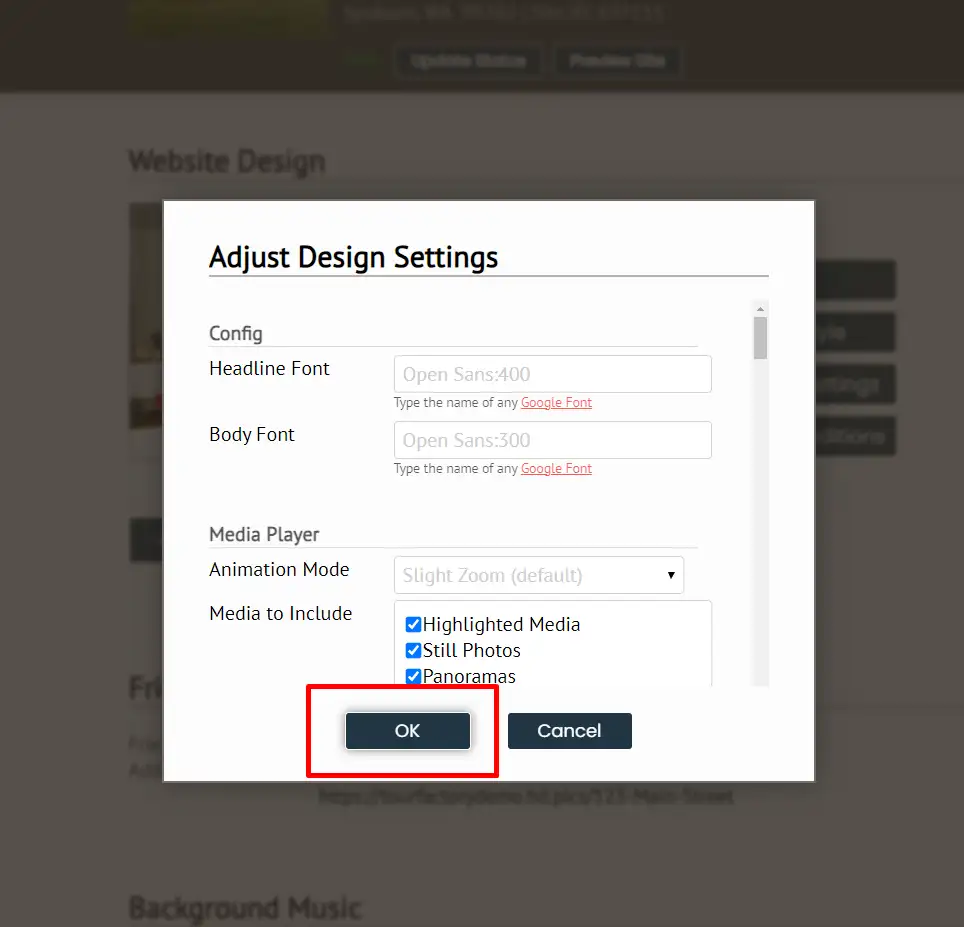
Step 9: Once your changes have been made, click ‘Ok’ to save them.
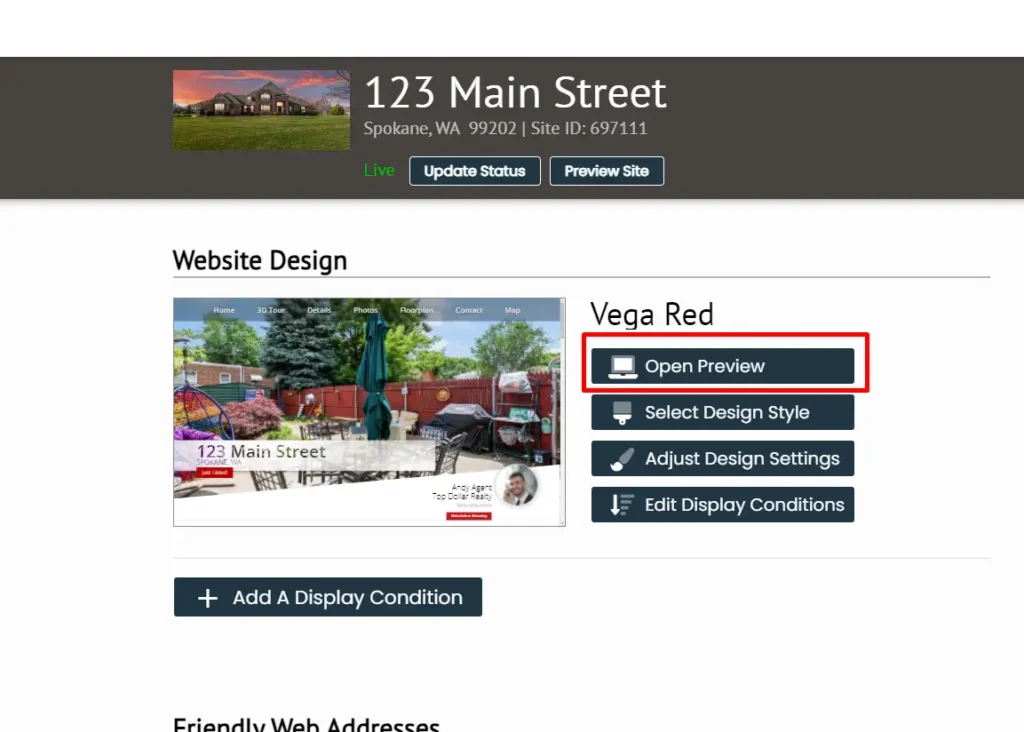
Step 10: To preview the site and any changes that you made, click the ‘Open Preview’ button.
Changing Site Design FAQ
Is it possible to set a default site design?
Yes, keep your branding consistent without having to remember or refer back to what your site design was on previous property sites. A default site design can be set in the “Default Design & Flyer” field, of the Basic Data tab on your Account. See this article for full instructions.
Related Content
Add a Display Condition
Property Site
How to Add a Display Condition Step 1: Go to the Site Summary Step 2: Click the Site Design tab Step 3: Select ‘Add A Display Condition’ Step 4: Choose…
How to Add/Change Music for your Property Site: Step 1: Go to Site Summary Step 2: Click the Site Design tab Step 3: Click ‘Select Background Music’ button Step 4:…
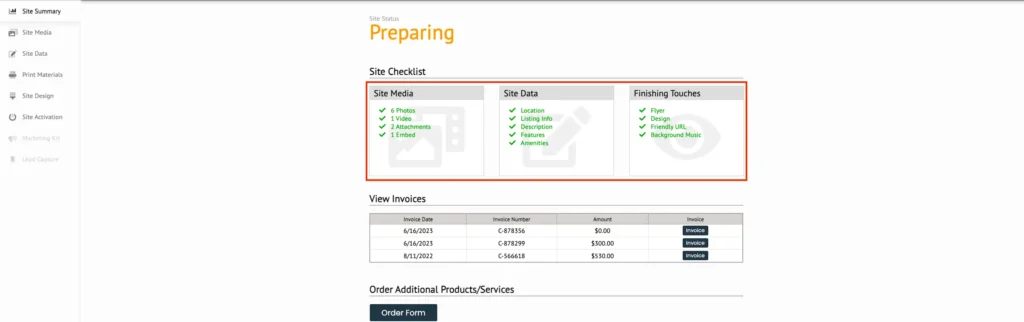
Step 4: Confirm tasks are complete by green checkmark
Step-by-Step:
Step 1: From the Sites tab at the top of the page, click the property that you would like to access the Site Checklist for. This will take you to the Site Summary page.
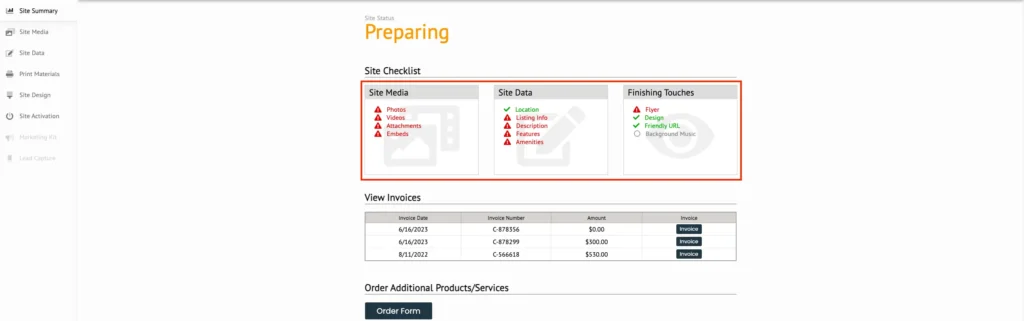
Step 2: While your site is in ‘Preparing’ status, the Site Checklist is visible in the summary tab. The checklist gives an overview of site items that need to be completed. The red warning symbol means the task is not complete, and the green checkmark means the task is complete.
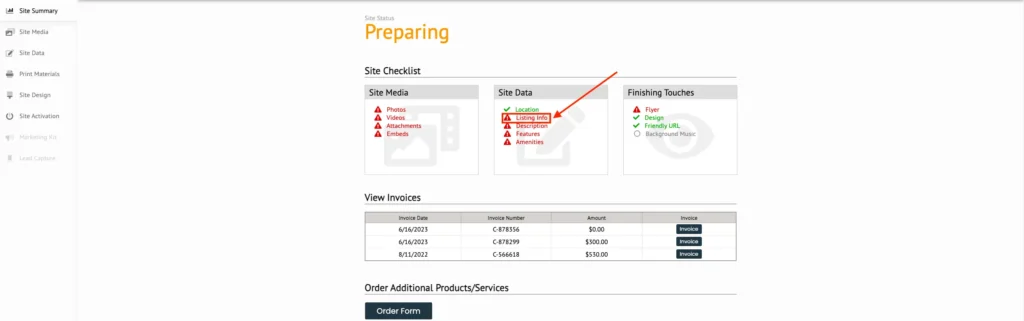
Step 3: Click on the task to complete or review; clicking on the task will bring you to the designated area:
Site Media: clicking will bring you to Site Media tab
Review to see if your Photographer has uploaded the following:
Photos
Videos
Attachments
Embeds
Site Data: clicking will bring you to Site Data tab
Review to confirm you have added all of the property’s details:
Locations
Listing Info
Description
Features
Amenities
Finishing Touches: clicking will bring you to Site Design tab
Review to confirm you have customized your site:
Flyer
Design
Friendly URL
Background Music
Note: To create/edit Flyer, go to the Print Materials tab
Step 4: As you complete the tasks, the Site Checklist will update to reflect. Complete the Site Data and Finishing Touches sections while you wait for the Site Media to be uploaded.
Related Content
Add a Display Condition
Property Site
How to Add a Display Condition Step 1: Go to the Site Summary Step 2: Click the Site Design tab Step 3: Select ‘Add A Display Condition’ Step 4: Choose…
How to Add/Change Music for your Property Site: Step 1: Go to Site Summary Step 2: Click the Site Design tab Step 3: Click ‘Select Background Music’ button Step 4:…
When you need to add a co-lister to your property site, please contact Client Services or your Photographer for assistance.
Adding a co-lister will:
Display their information on the property site
Give you the ability to create flyers with the co-lister. You must select a flyer template with “Co-Lister” in the name.
Give you the ability to create social media tiles with the co-lister. You must select a tiles template with “Co-List” in the name.
Give them access to edit the property site and marketing materials
Your co-lister can recreate any single agent flyer or tile by manually editing the agent information.
Unfortunately co-listers cannot be added to your site videos.
Note: Your co-lister will need to have an account in order to be listed on the property site.
Related Content
Add a Display Condition
Property Site
How to Add a Display Condition Step 1: Go to the Site Summary Step 2: Click the Site Design tab Step 3: Select ‘Add A Display Condition’ Step 4: Choose…
How to Add/Change Music for your Property Site: Step 1: Go to Site Summary Step 2: Click the Site Design tab Step 3: Click ‘Select Background Music’ button Step 4:…
Step 9: Scroll to the bottom of the page and click “Save Changes”
View the video below for a quick how-to overview:
Step-by-Step:
Step 1: From the Sites tab at the top of the page, click on the property that your would like to edit the information for. This will take you to the Site Summary page.
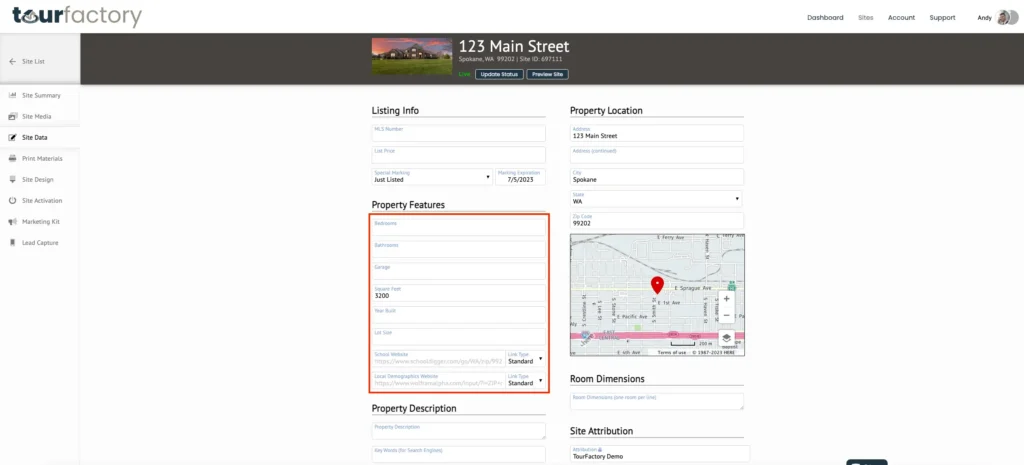
Step 2: Click on the Site Data tab on the left-hand side of the page.
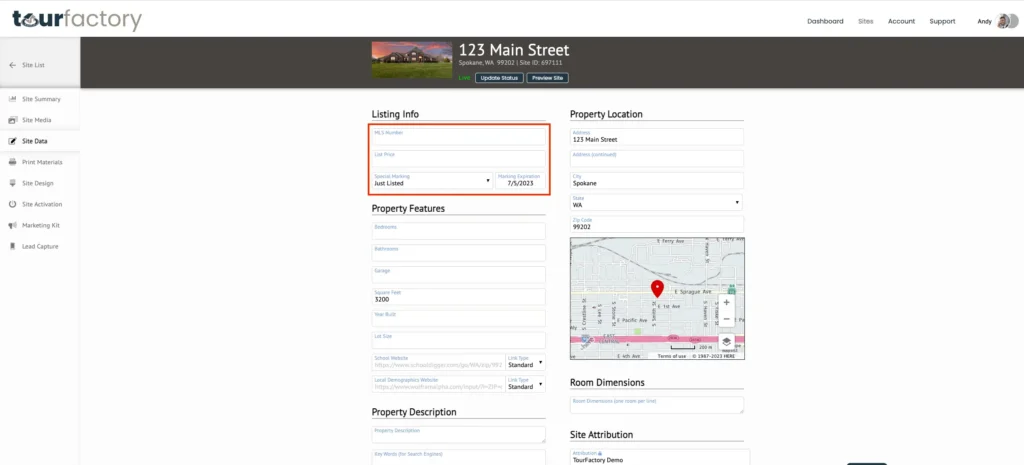
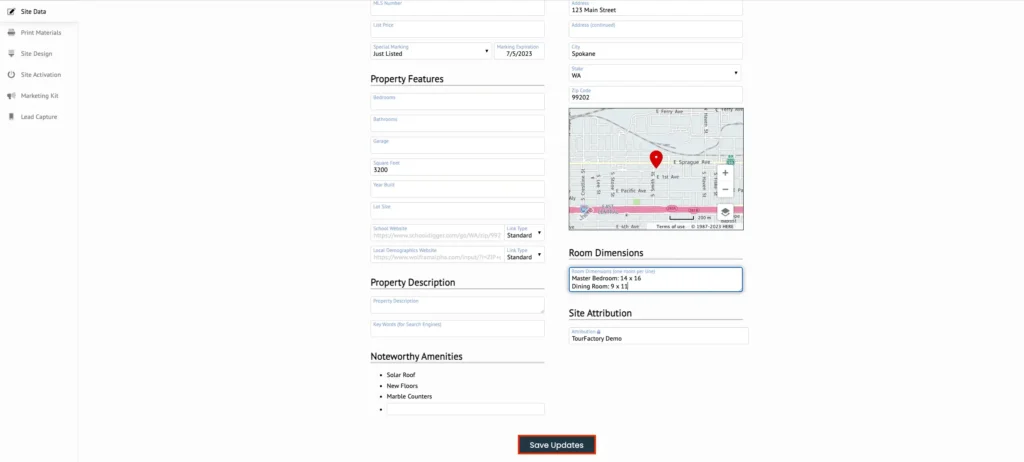
Step 3: In the Listing Info section, enter in the MLS number, Listing Price and a Special Marking for the site (if needed).
Step 4: In the Property Features section, you can enter in the beds/baths, square footage, lot size and a few other details. By default, we include a School Website and Local Demographics Website that will be displayed for potential buyers. You can change or disable these links if you would like.
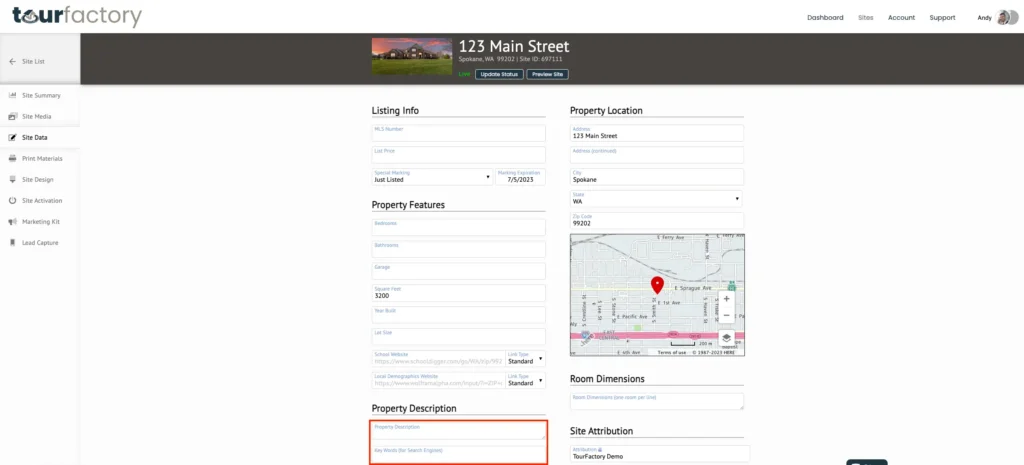
Step 5: In the Property Description section, enter in a property description for the home. You can also enter in Key Words for search engine optimization.
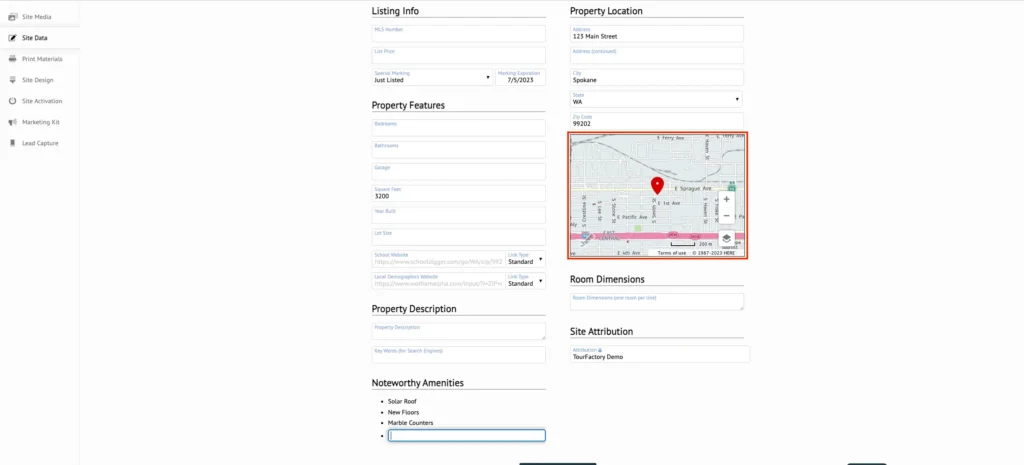
Step 6: In the Noteworthy Amenities section, list out amenities that come with the home.
Note: these will be displayed on the site in the order that you enter them.
Step 7: If needed, you can move the map pin to the proper location. Note: the property address is locked in after 30 days. If there is an error and you need to correct it, please contact us and we are happy to take care of this for you.
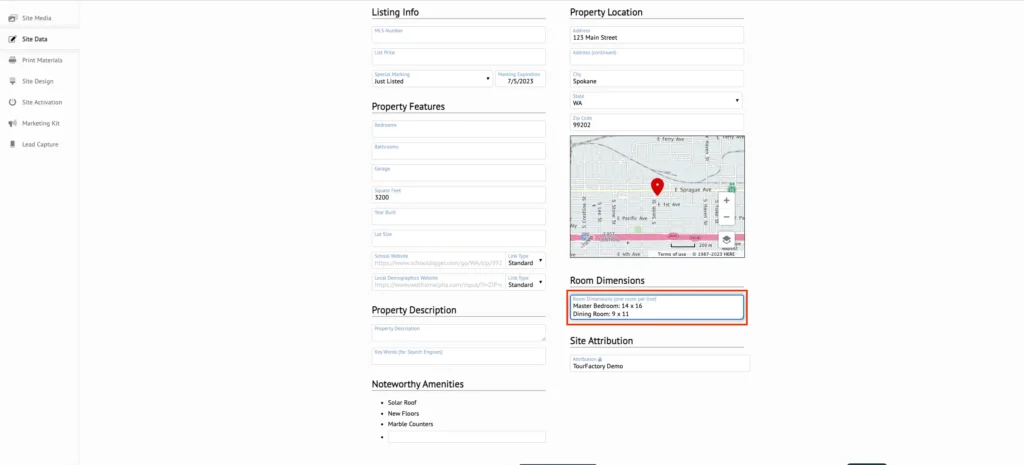
Step 8: If you’d like, you can also add Room Dimensions to display on the property site. For example, you can highlight the dimensions of the master bedroom, bonus room, etc..
Step 9: Scroll to the bottom of the page and click “Save Changes”.
Related Content
Add a Display Condition
Property Site
How to Add a Display Condition Step 1: Go to the Site Summary Step 2: Click the Site Design tab Step 3: Select ‘Add A Display Condition’ Step 4: Choose…
How to Add/Change Music for your Property Site: Step 1: Go to Site Summary Step 2: Click the Site Design tab Step 3: Click ‘Select Background Music’ button Step 4:…
Step 1: From the Sites tab at the top of the page, click the property that you would like to add a display condition for. This will take you to the Site Summary page.
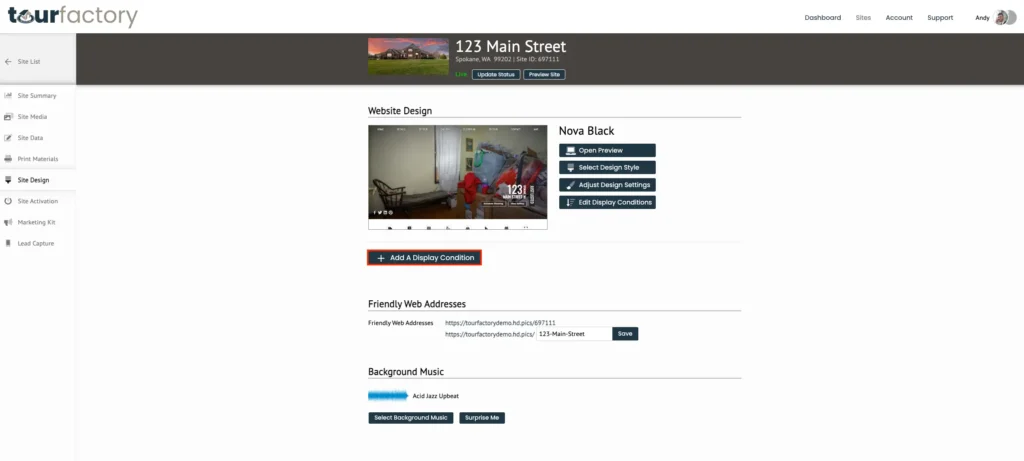
Step 2: Click the Site Design tab on the left-hand side.
Step 3: Under the Website Design section, select ‘Add A Display Condition’ button.
Step 4: In the pop-up box, on the left-hand side, choose the Design Style Series that you would like to use.
Step 5: In the drop-down menu that appears, select the Series color that you would like to use. Clicking on a series color will give you a preview of what the site will look like with that color selected. Note: you can scroll down in the preview box to view the whole site in the selected color.
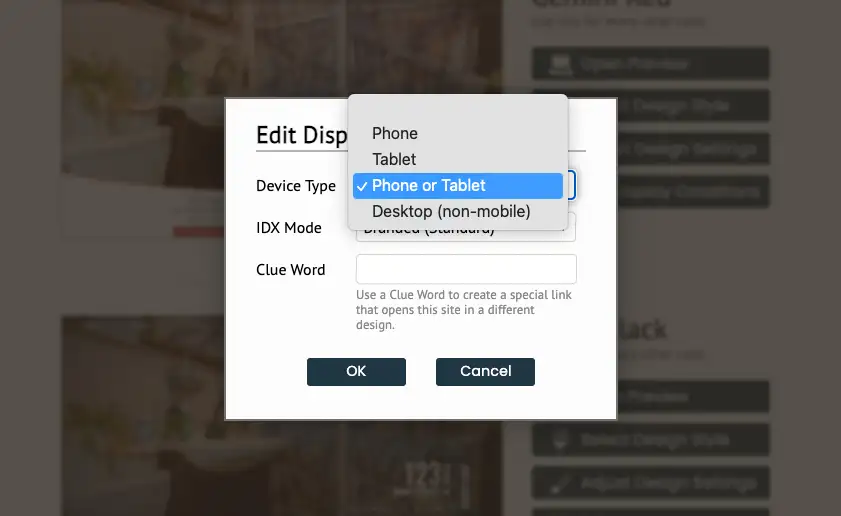
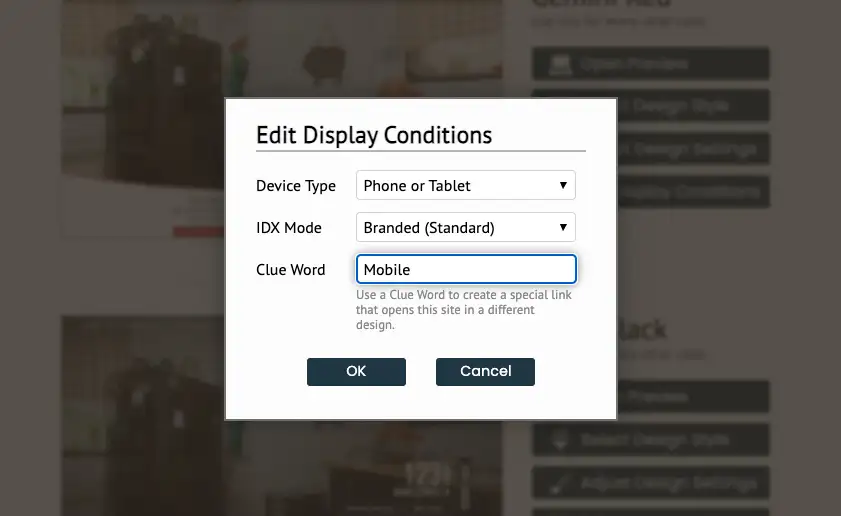
Step 6: Select the ‘Device Type’ from the drop-down menu. This will choose when to apply the condition (i.e. if a potential buyer views your site from their phone).
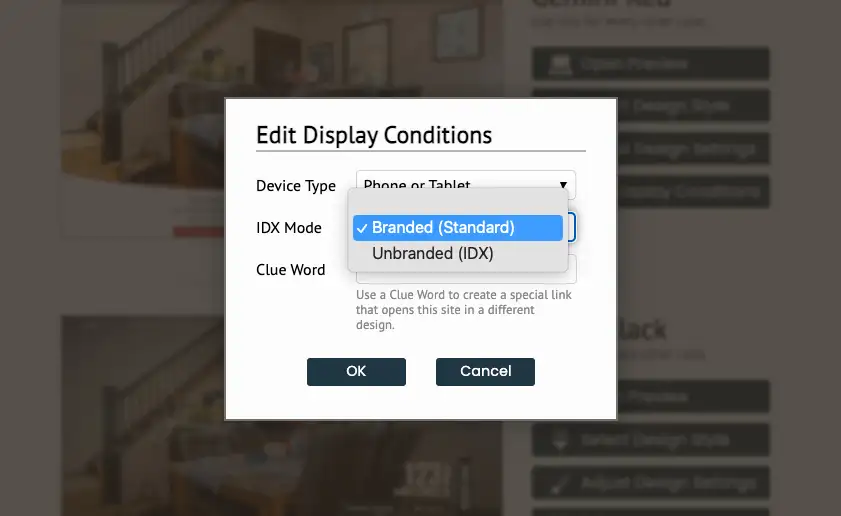
Step 7: Select the ‘IDX Mode’: either Branded or Unbranded.
Step 8: If you would like, you can type in a ‘Clue Word’ to create a special link. An example of how you would use this feature is, you could send a special link to any potential buyer who only uses their mobile device to view websites.
Step 9: Once you’ve chosen your conditions, click ‘OK’.
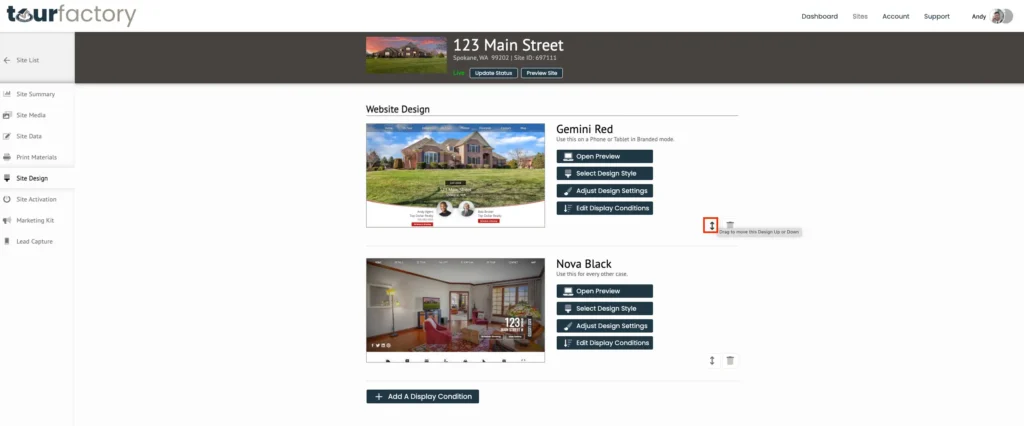
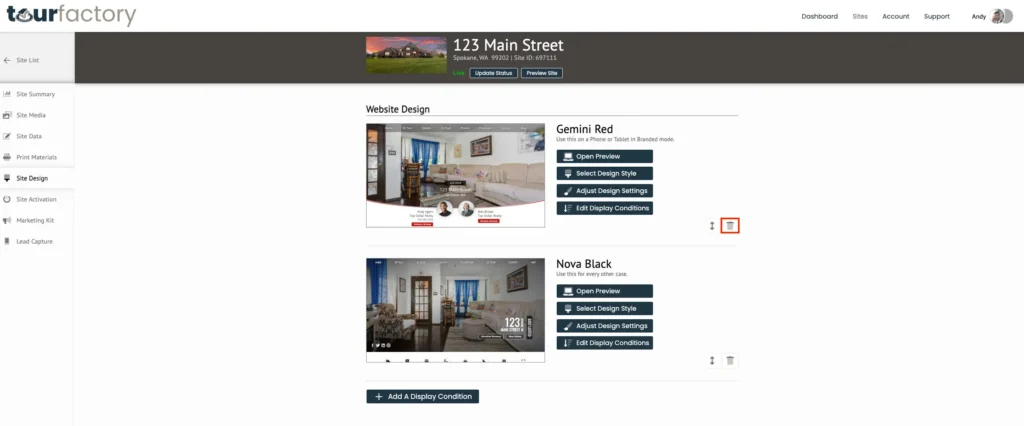
Step 10: If you would like to rearrange your conditions, click the vertical arrow icon and drag to move the design up or down.
Step 11: If you would like to delete an extra design, click the trash icon.
Related Content
Adding Music
Property Site
How to Add/Change Music for your Property Site: Step 1: Go to Site Summary Step 2: Click the Site Design tab Step 3: Click ‘Select Background Music’ button Step 4:…