TourFactory’s beloved classic virtual tour, Elegant, is now available on the new TourFactory platform! Enjoy the same sleek look you’ve always loved. The new Elegant site template showcases your media with a seamless slideshow presentation, complemented by a convenient carousel at the bottom for easy navigation. It’s the perfect way to present your listings with style and sophistication.
Step-by-Step
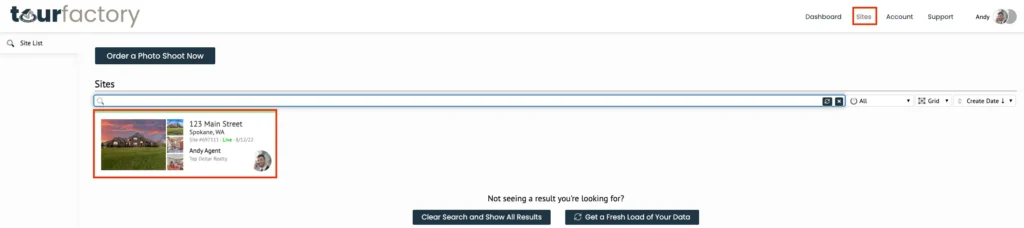
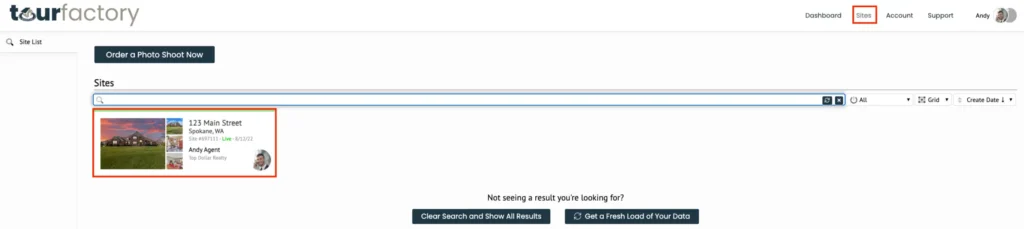
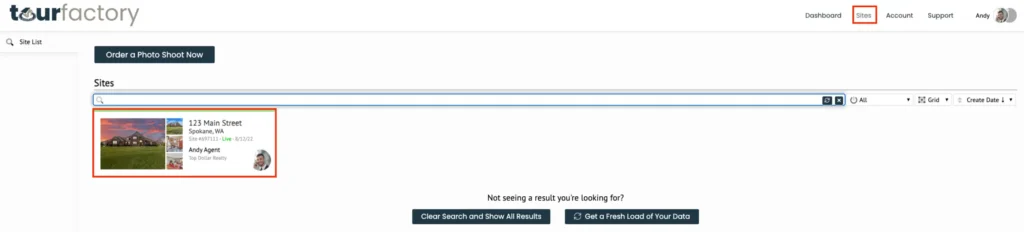
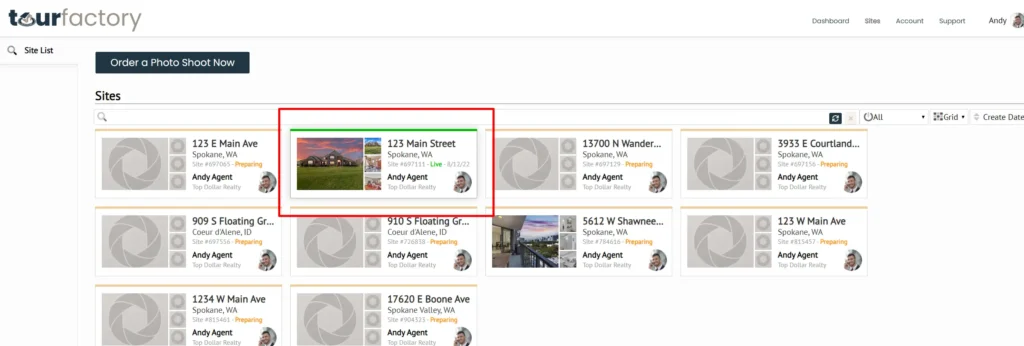
Step 1: Find the order on your Dashboard or Sites page. Click the address or thumbnail to enter the order settings.
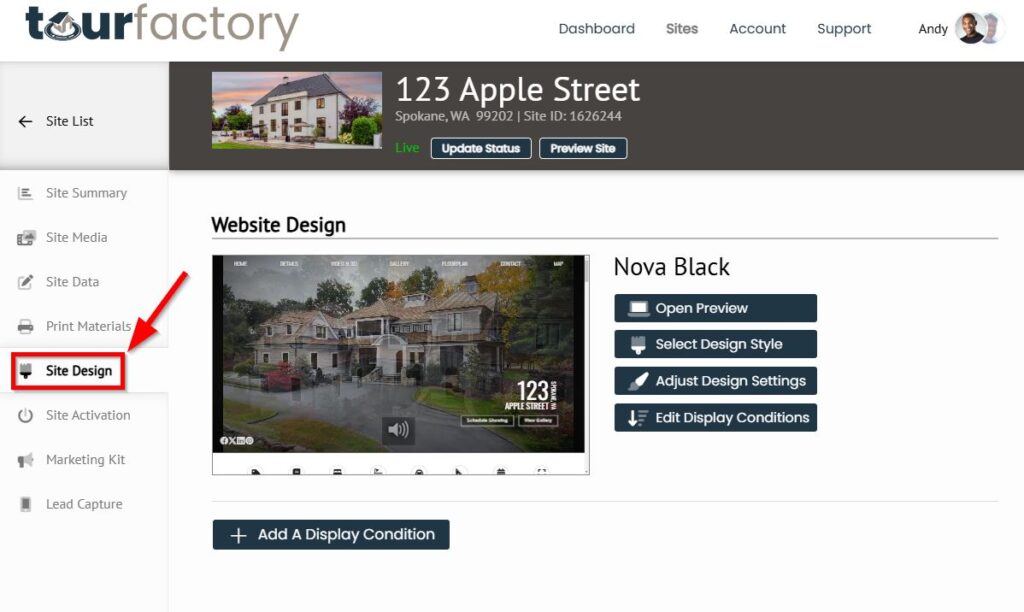
Step 2: On the left hand menu choose Site Design.
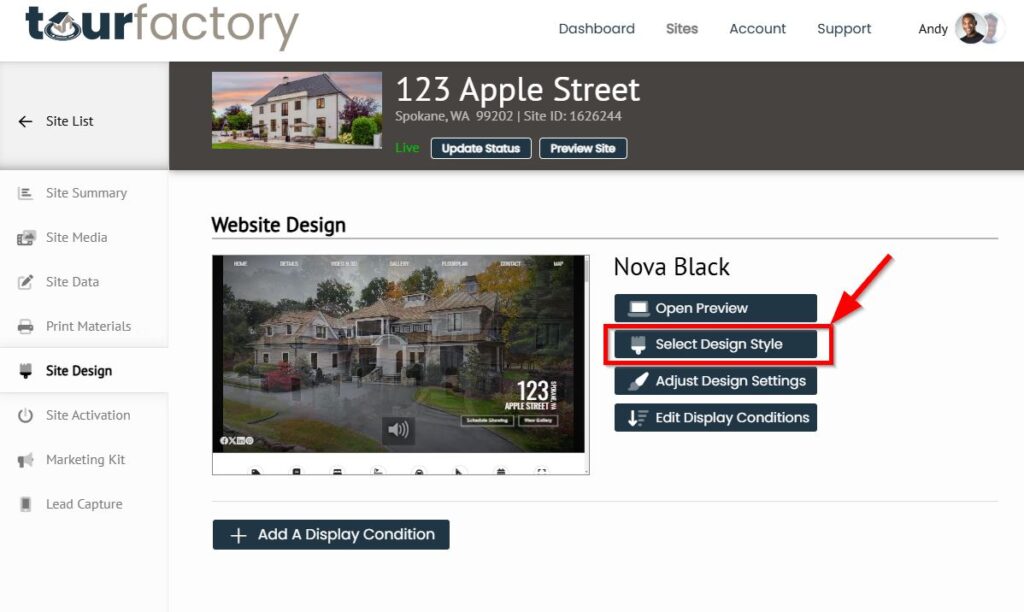
Step 3: Under the Website Design section choose Select Design Style
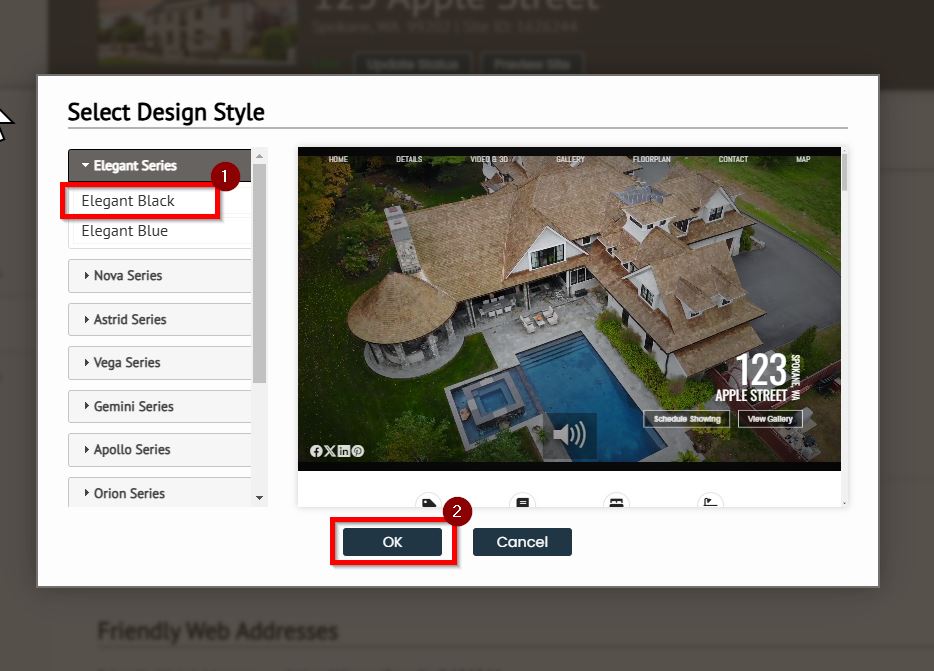
Step 4: Find the Elegant Series, choose a color, click OK
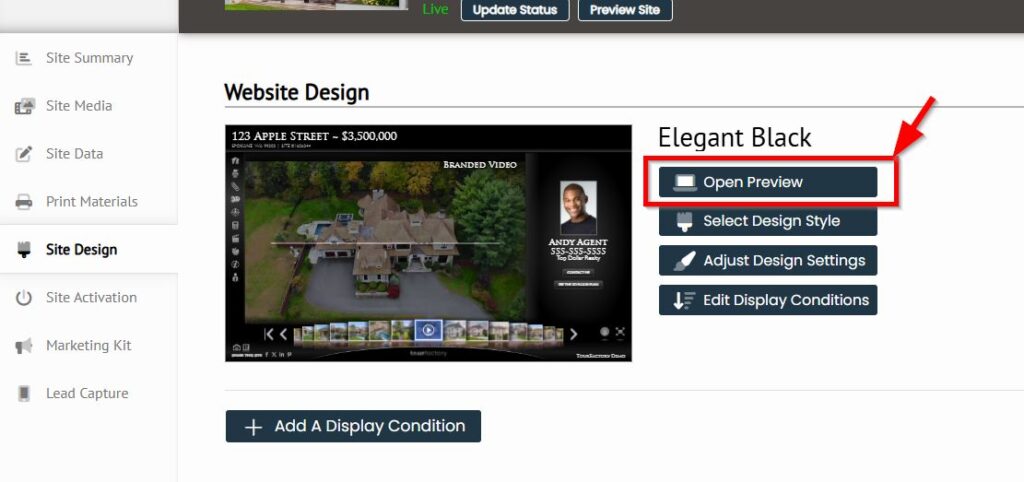
Step 5: If you’d like to preview the design click Open Preview
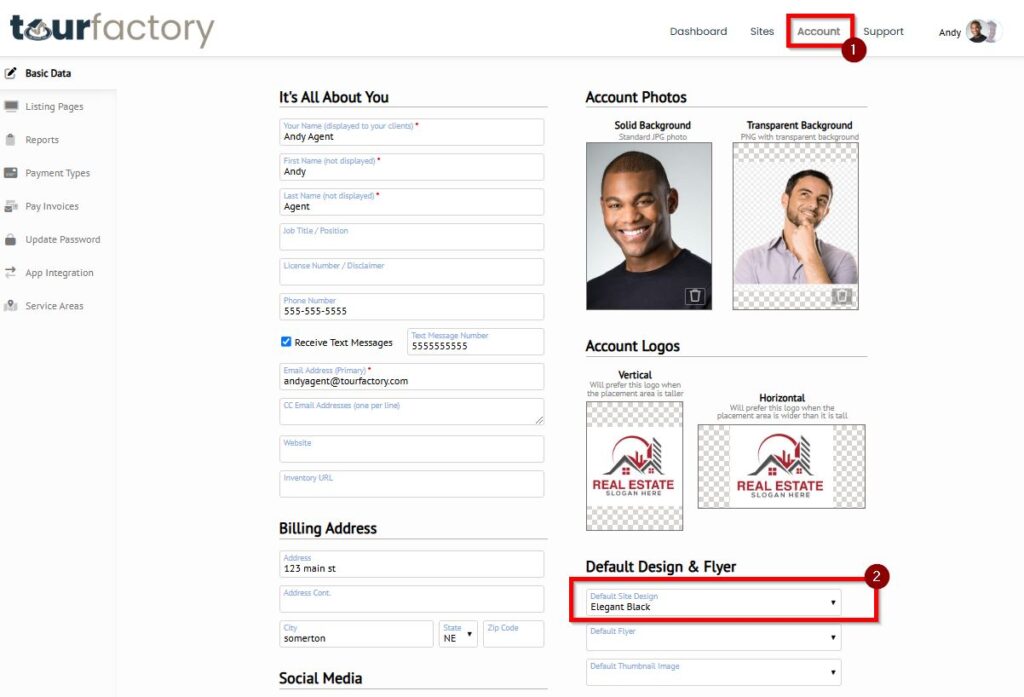
Step 6: Do you want to make this template the default going forward? Select Account on the top navigation bar and scroll to the Default Design & Flyer section. Select Elegant under Default Site Design
Related Content
Add a Display Condition
Property Site
How to Add a Display Condition Step 1: Go to the Site Summary Step 2: Click the Site Design tab Step 3: Select ‘Add A Display Condition’ Step 4: Choose…
How to Add/Change Music for your Property Site: Step 1: Go to Site Summary Step 2: Click the Site Design tab Step 3: Click ‘Select Background Music’ button Step 4:…
Step 3: Scroll down to the “YOUR BRANDED & UNBRANDED PROPERTY SITE” section and click button to copy the link
Step-by-Step:
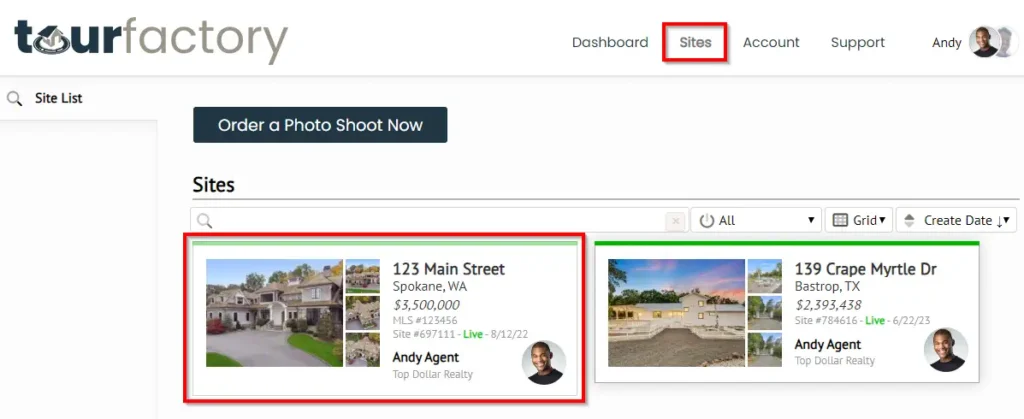
Step 1: From the Sites tab at the top of the page, click on the property that you need to access the links for. This will take you to the Site Summary.
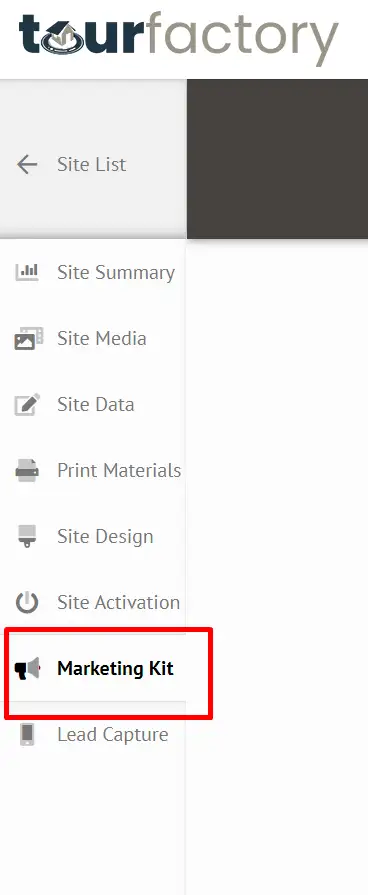
Step 2: Click on the Marketing Kit tab on the left-hand side. This will open up a new web browser page with the Marketing Kit materials.
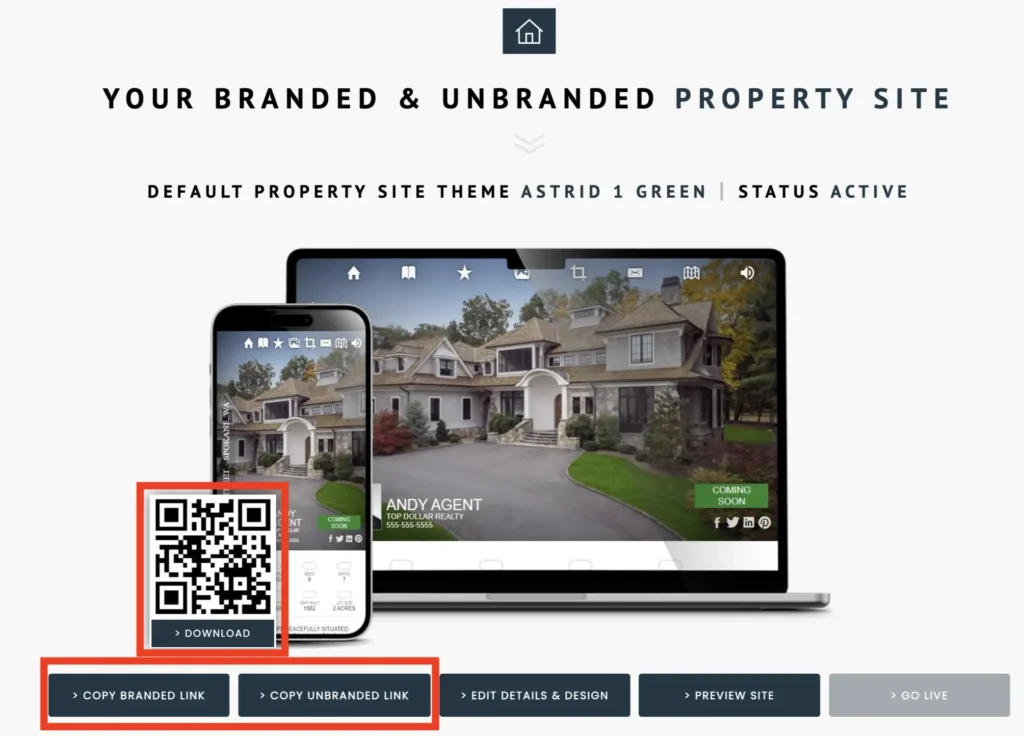
Step 3: Scroll down till you see the house icon with the header “YOUR BRANDED & UNBRANDED PROPERTY SITE”. Click the “Copy Branded Link” or “Copy Unbranded Link” buttons to copy the URL. Then paste the link into your mls, social media accounts, newsletters, etc.
Tip: You can also download your QR Code image by clicking the ‘Download’ button.
Related Content
Add a Display Condition
Property Site
How to Add a Display Condition Step 1: Go to the Site Summary Step 2: Click the Site Design tab Step 3: Select ‘Add A Display Condition’ Step 4: Choose…
How to Add/Change Music for your Property Site: Step 1: Go to Site Summary Step 2: Click the Site Design tab Step 3: Click ‘Select Background Music’ button Step 4:…
Share your Property site, Marketing kit, Downloads, and Media Preview with others!
View the video below for a quick how-to overview:
Click the tabs below to learn more:
Property
Share your Property Site links on your MLS and social media to boost your site’s exposure.
How to Find Branded/Unbranded Links:
Step 1: Go to the Site Summary
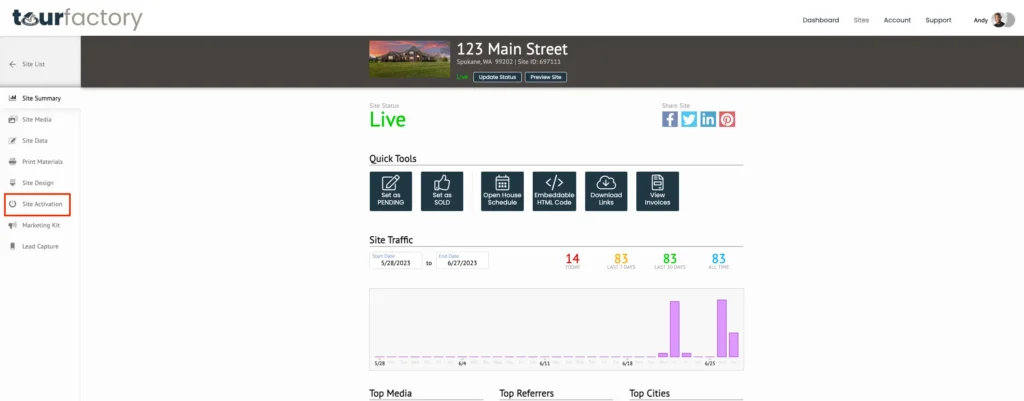
Step 2: Click on the Site Activation tab
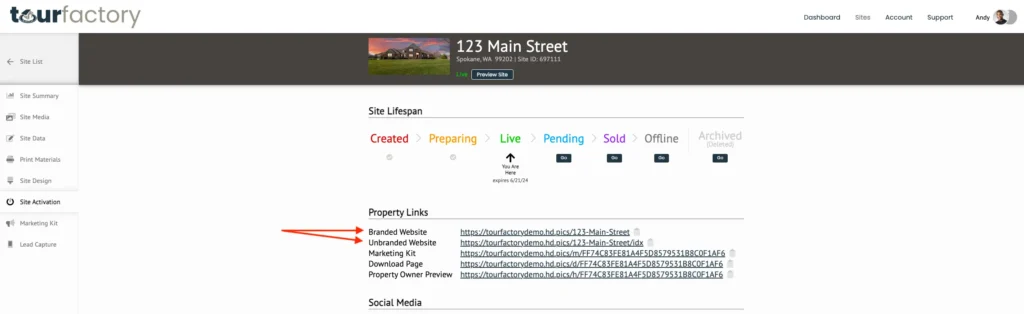
Step 3: Under Property Links, locate the Branded/Unbranded links
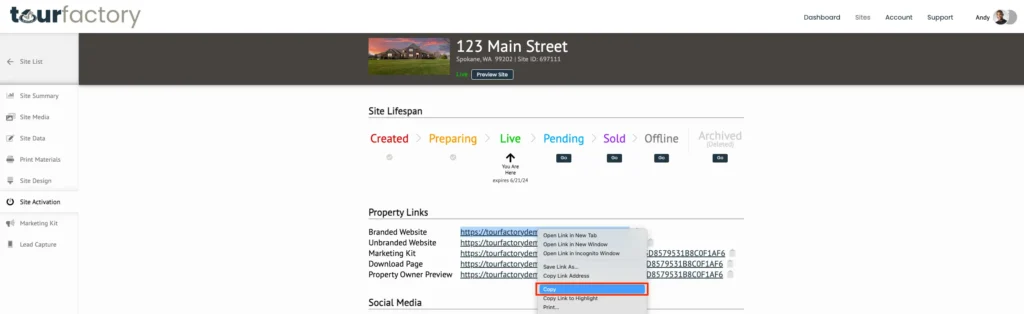
Step 4: Right-click the link and select copy
Note: Branded/Unbranded links are also available in the Marketing Kit; you can also download your QR code image there. Check out our Website Links article.
Step-by-Step:
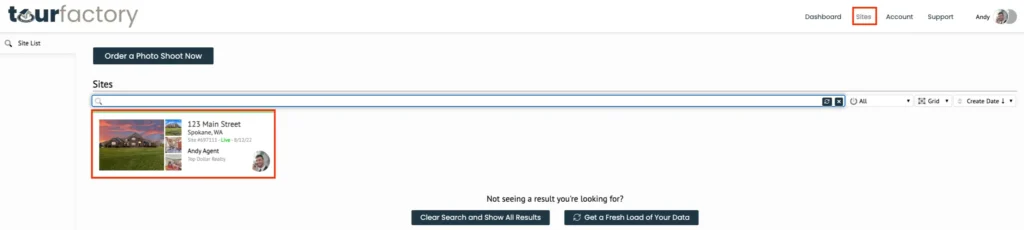
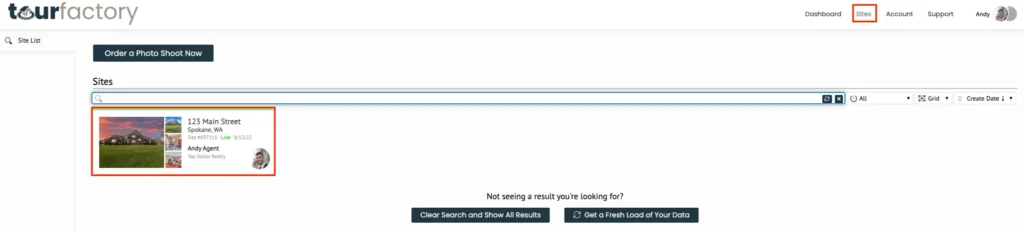
Step 1: From the Sites tab at the top of the page, click the property that you would like to share your site links for. This will take you to the Site Summary page.
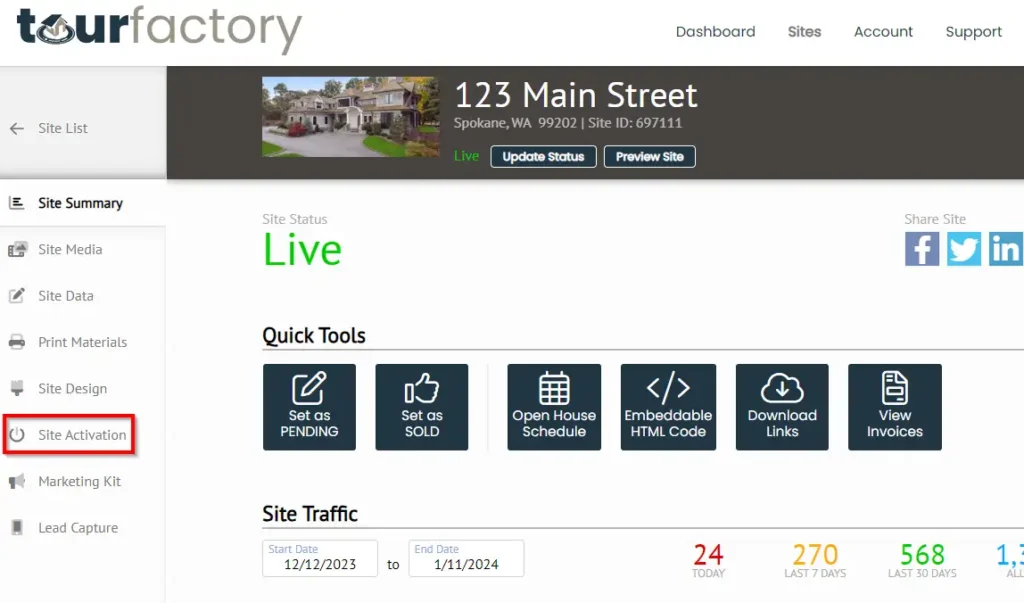
Step 2: Click on the Site Activation tab on the left-hand side.
Step 3: Under the Property Links section, locate your Branded and/or Unbranded links. Note: you may need to scroll to the bottom of the page if Property Links is not up top.
Step 4: Right-click the link and select copy
Marketing
Share your Marketing Kit link to give viewing and live editing access. The user does not need to be logged in to view or make edits.
How to Find Marketing Kit Link:
Step 1: Go to the Site Summary
Step 2: Click on the Site Activation tab
Step 3: Under Property Links, locate the Marketing Kit link
Step 4: Click the clipboard icon to copy the link
Step-by-Step:
Step 1: From the Sites tab at the top of the page, click the property that you would like to share your marketing materials for. This will take you to the Site Summary page.
Step 2: Click on the Site Activation tab on the left-hand side.
Step 3: Under Property Links section, locate your Marketing Kit link. Note: you may need to scroll to the bottom of the page if Property Links is not displayed on the top.
Step 4: Click the clipboard icon to copy the link. You’ll know the copy is successful when the yellow ‘Copied to Clipboard’ message appears.
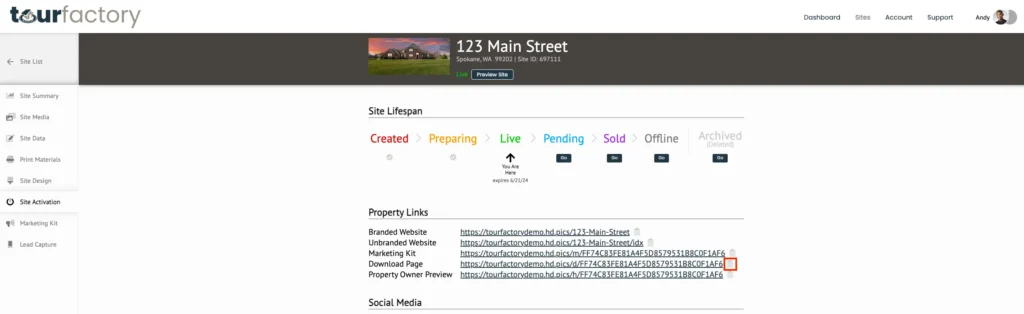
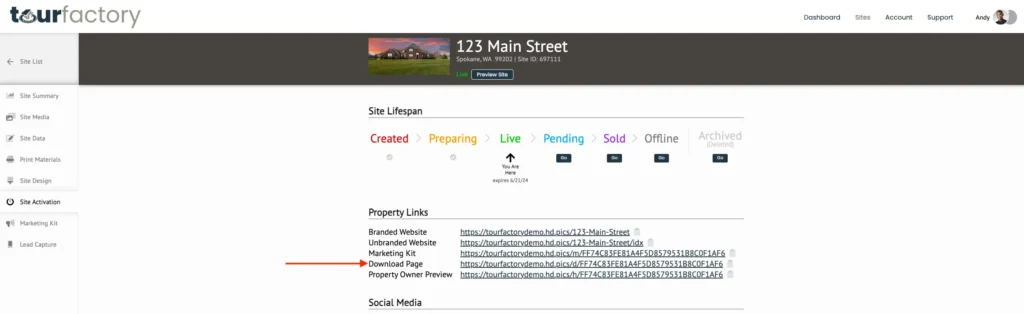
Download
Share your Download Page link to give the ability to download all media uploaded in the Site Media tab. The user does not need to be logged in to download.
How to Find Download Page Link:
Step 1: Go to the Site Summary
Step 2: Click on the Site Activation tab
Step 3: Under Property Links, locate the Download Page link
Step 4: Click the clipboard icon to copy the link
Step-by-Step:
Step 1: From the Sites tab at the top of the page, click the property that you would like to share the download page for. This will take you to the Site Summary page.
Step 2: Click the Site Activation tab on the left-hand side.
Step 3: Under the Property Links section, locate your Download Page link.
Step 4: Click the clipboard icon to copy the link. You’ll know the copy is successful when the yellow ‘Copied to Clipboard’ message appears.
Preview
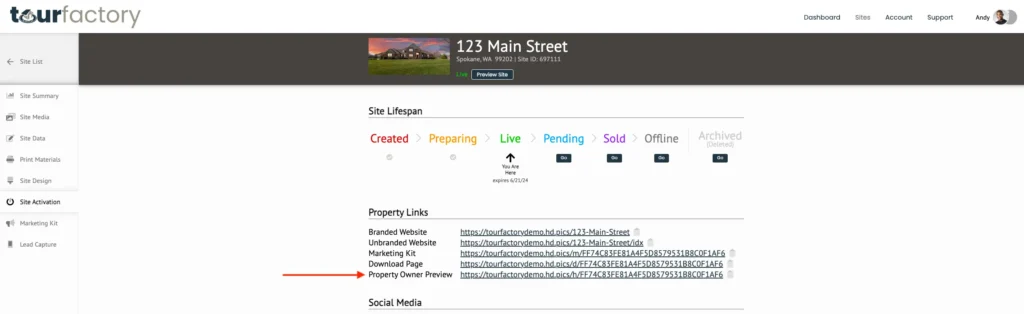
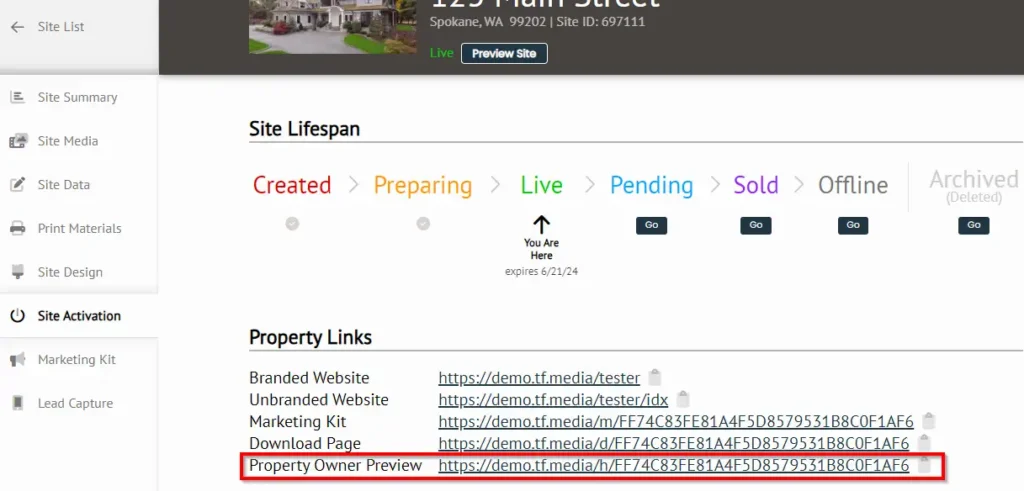
Share your Property Owner Preview link to give view-only access to your site’s media. The user does not need to be logged in to view.
How to Find Property Owner Preview Link:
Step 1: Go to the Site Summary
Step 2: Click on the Site Activation tab
Step 3: Under Property Links, locate the Property Owner Preview link
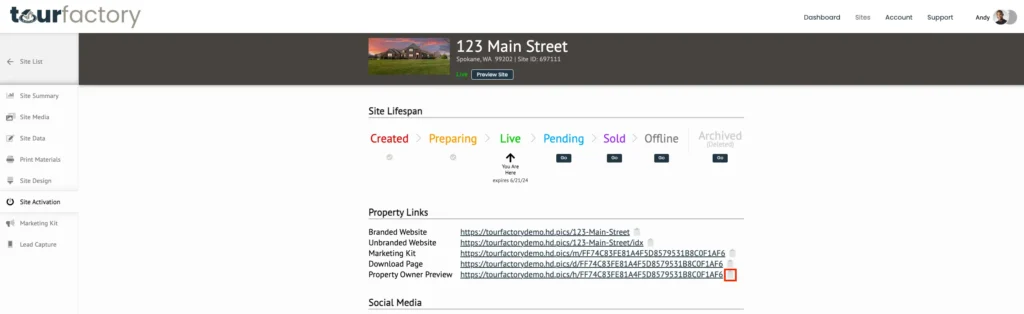
Step 4: Click the clipboard icon to copy the link
Note: photos are unable to be saved in this link view.
Step-by-Step:
Step 1: From the Sites tab at the top of the page, click the property that you would like to share the preview link for. This will take you to the Site Summary page.
Step 2: Click on the Site Activation tab on the left-hand side.
Step 3: Under the Property Link section, locate the Property Owner Preview link.
Step 4: Click the clipboard icon to copy the link. You’ll know the copy is successful when the yellow ‘Copied to Clipboard’ message appears.
Related Content
Add a Display Condition
Property Site
How to Add a Display Condition Step 1: Go to the Site Summary Step 2: Click the Site Design tab Step 3: Select ‘Add A Display Condition’ Step 4: Choose…
How to Add/Change Music for your Property Site: Step 1: Go to Site Summary Step 2: Click the Site Design tab Step 3: Click ‘Select Background Music’ button Step 4:…
You may want your homeowner to preview the photos or the listing site prior to going live. Here is how to do that.
How to Share Photos or Guest Editing with your Homeowner
Step 1: Go to Site Summary
Step 2: Click the Site Activation tab
Step 3: View the Property Links section. To send a webpage where your homeowner can view all the ordered media, send the Property Owner Preview
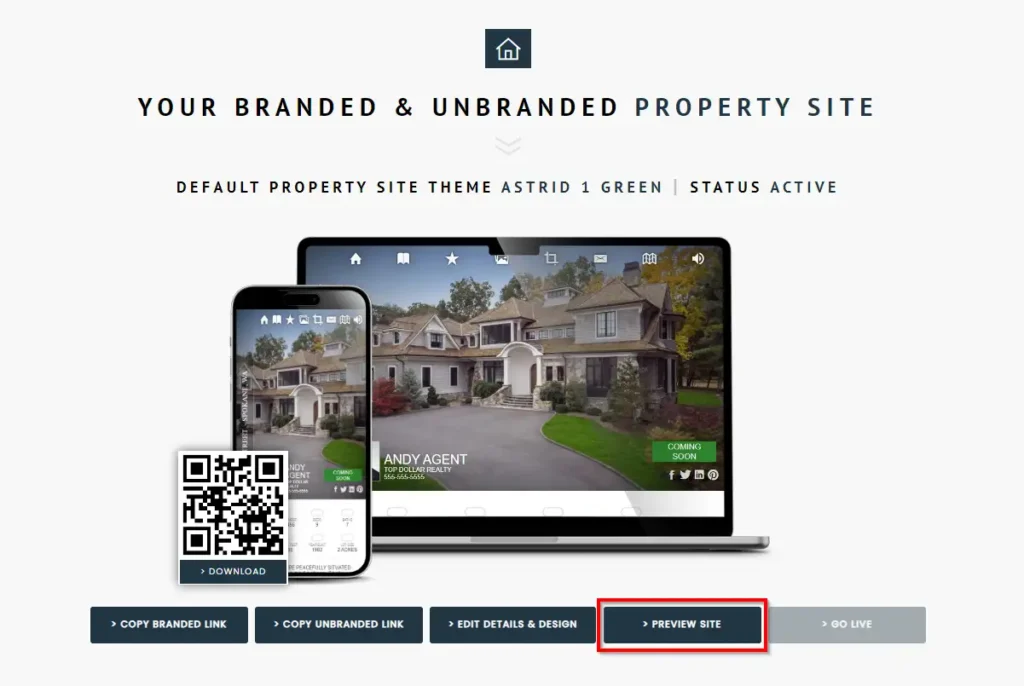
Step 4: Via the Marketing Kit, you can click Preview Site to view an inactive property website
Step-by-Step:
Step 1: Enter the settings for your order by clicking Sites and then click the order.
Step 2: Click Site Activation on the left hand toolbar.
Step 3: View the Property Links section in the middle of the page. To send a website here your homeowner can view all the ordered media, send the Property Owner Preview.
Step 4: If you’d like your homeowner to view your listing website prior to going live, you’ll send them the Marketing Kit link. Note: When they are viewing the link they need to scroll down to the YOUR BRANDED & UNBRANDED PROPERTY SITE section and click PREVIEW SITE.
How to Add a Display Condition Step 1: Go to the Site Summary Step 2: Click the Site Design tab Step 3: Select ‘Add A Display Condition’ Step 4: Choose…
How to Add/Change Music for your Property Site: Step 1: Go to Site Summary Step 2: Click the Site Design tab Step 3: Click ‘Select Background Music’ button Step 4:…
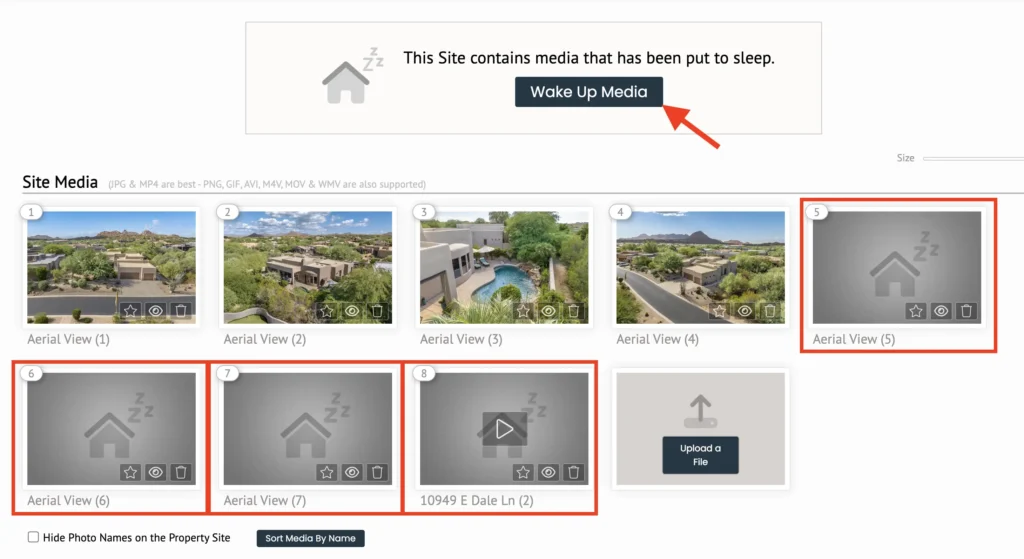
After 30+ days, if a site hasn’t been updated and is inactive it will automatically put the media to sleep. This means that the media is being stored until needed.
Note: the first (4) tiles aren’t put to sleep and are still available because these images appear on the site when you do a search in the Site tab.
How to Wake Up Media
Click the “Wake Up Media” button at the top of the Site Media page to start the wake up. The time to restore the media will vary based on the amount of content. Once finished, the Download Page button will appear as usual.
Related Content
Add a Display Condition
Property Site
How to Add a Display Condition Step 1: Go to the Site Summary Step 2: Click the Site Design tab Step 3: Select ‘Add A Display Condition’ Step 4: Choose…
How to Add/Change Music for your Property Site: Step 1: Go to Site Summary Step 2: Click the Site Design tab Step 3: Click ‘Select Background Music’ button Step 4:…
To change the order of photos on your media page you can select and drag images. There are two ways to do this with multiple:
Hold Control and click each photo you’d like to move.
Click and drag your mouse to create a box around the photos you’d like to select.
The photos you have selected will be highlighted in red. You may then drag the photos to reorder them in the way you like.
Related Content
Add a Display Condition
Property Site
How to Add a Display Condition Step 1: Go to the Site Summary Step 2: Click the Site Design tab Step 3: Select ‘Add A Display Condition’ Step 4: Choose…
How to Add/Change Music for your Property Site: Step 1: Go to Site Summary Step 2: Click the Site Design tab Step 3: Click ‘Select Background Music’ button Step 4:…
Step 4: Download photos all at once, only a select few, or individually
View the video below for a quick how-to overview:
Step-by-Step:
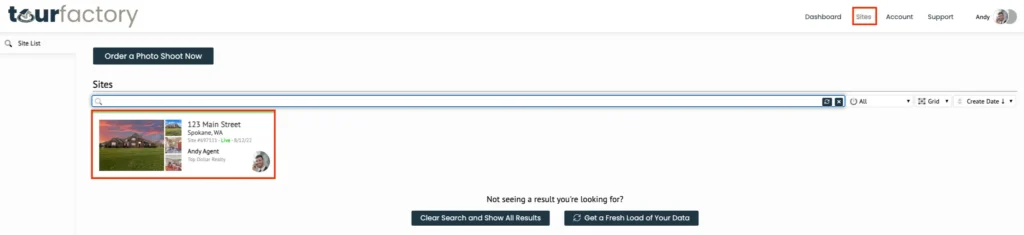
Step 1: From the Sites tab at the top of the page, click the property that you would like to download the photos for. This will take you to the Site Summary page.
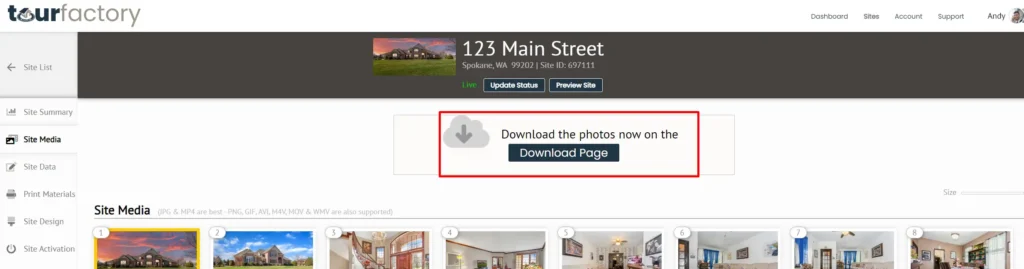
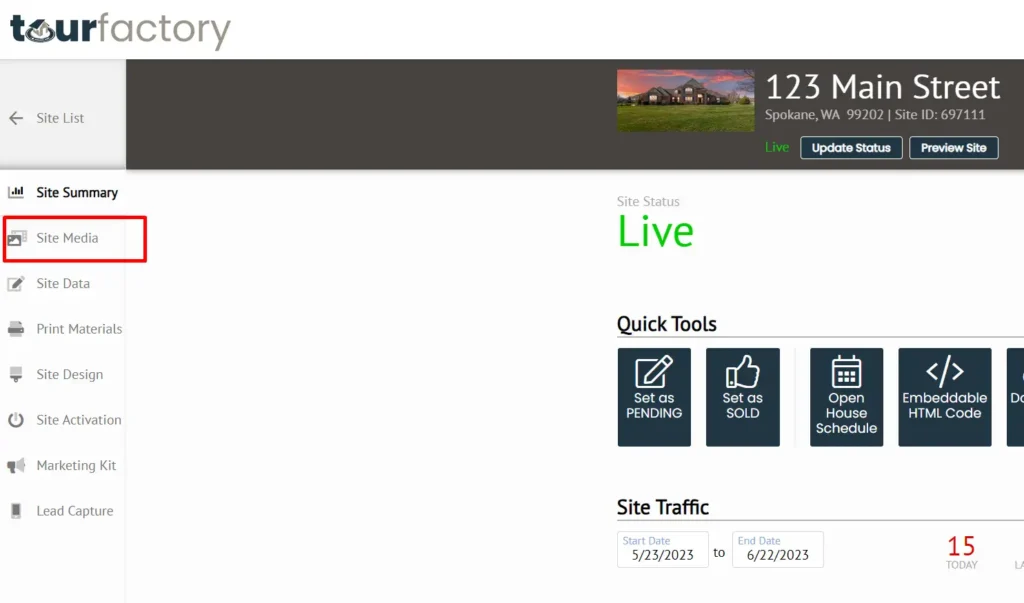
Step 2: From the Site Summary page, navigate to the Site Media tab on the left-hand side.
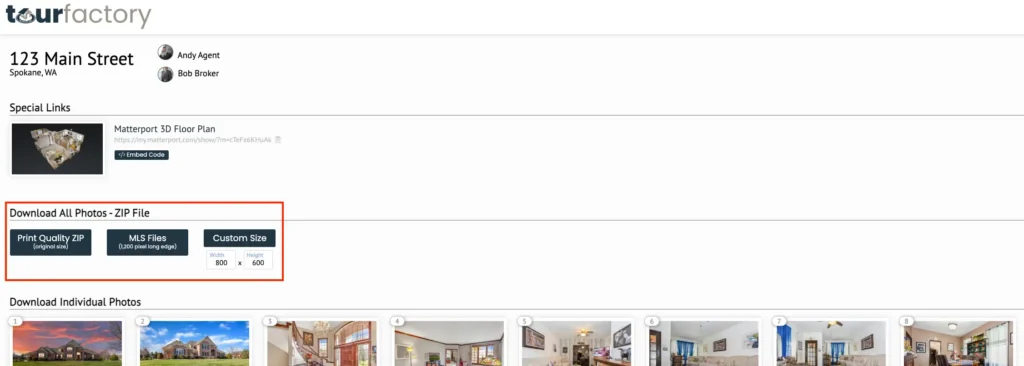
Step 3: On the Site Media page, all uploaded photos, floor plans, site attachments, and embedded media will display. To download photos, click the ‘Download Page’ button at the top of the page.
Step 4: You may download your photos one of three ways:
All Photos at Once
To download all photos at once, determine the size you wish to download and click the corresponding size button:
Print Quality Zip – Original size, high-quality image
MLS Files – 1,200 pixel long edge; acceptable for majority of MLS sites
Custom Size – Edit the width and height as needed
Note: the photos will download as a .zip file, which will need to be extracted. See the article below for instructions on how to unzip files.
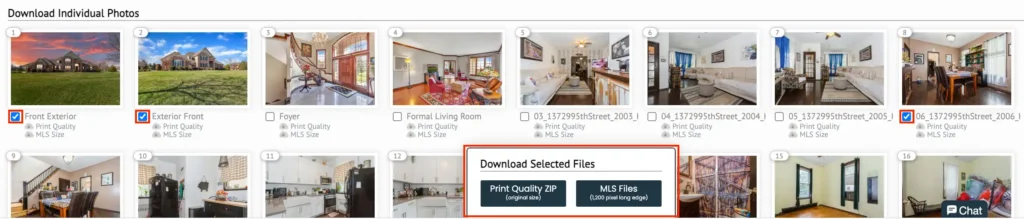
To download only a select few photos, check the box under the desired photos, under the ‘Download Individual Photos’ header, and click the corresponding size button:
Print Quality Zip – Original size, high-quality image
MLS Files – 1,200 pixel long edge; acceptable for majority of MLS sites
Note: the photos will download as a .zip file, which will need to be extracted. See the article below for instructions on how to unzip files.
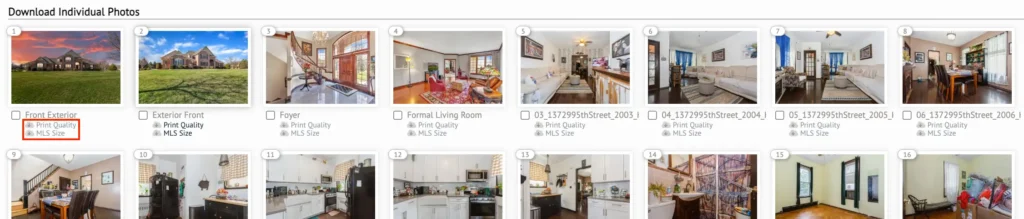
To download photos individually, click the size option under the image:
Print Quality – Original size, high-quality image
MLS Size – 1,200 pixel long edge; acceptable for majority of MLS sites
Note: photo will download as a .jpg image
Related Content
Add a Display Condition
Property Site
How to Add a Display Condition Step 1: Go to the Site Summary Step 2: Click the Site Design tab Step 3: Select ‘Add A Display Condition’ Step 4: Choose…
How to Add/Change Music for your Property Site: Step 1: Go to Site Summary Step 2: Click the Site Design tab Step 3: Click ‘Select Background Music’ button Step 4:…
How to Renew Your Marketing Kit and Custom Domain:
Click the tabs and drop-downs to learn more:
Marketing Kit
Your Marketing Kit will expire after 1 year. When your year is up, you will see a renewal option on your Dashboard and in your Site Activation tab.
Dashboard Renewal
When your Marketing Kit is about to expire, you will see an ‘Expiring Sites’ section on your Dashboard.
Site Activation tab Renewal
When your Marketing Kit is about to expire, you will see a renewal option under the ‘What’s Next?’ section in the Site Activation tab.
Custom Domain
Your Custom Domain will expire after 1 year. When your year is up, you will see a renewal option on your Dashboard and in your Site Design tab.
Dashboard Renewal
When your Custom Domain is about to expire (within 30 days), you will see an ‘Expiring Sites Domains’ section on your Dashboard.
Site Design tab Renewal
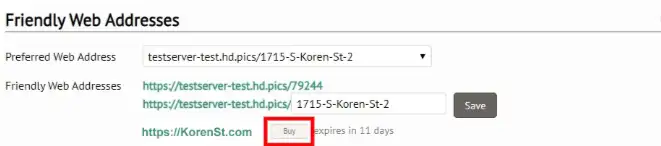
When your Custom Domain is about to expire (within 30 days), you will see a renewal option under ‘Friendly Web Addresses’ section in the Site Design tab.
Related Content
Add a Display Condition
Property Site
How to Add a Display Condition Step 1: Go to the Site Summary Step 2: Click the Site Design tab Step 3: Select ‘Add A Display Condition’ Step 4: Choose…
How to Add/Change Music for your Property Site: Step 1: Go to Site Summary Step 2: Click the Site Design tab Step 3: Click ‘Select Background Music’ button Step 4:…
Note: If you have not purchased a Marketing Kit, the 3D links can also be found on the Site Media tab by clicking the ‘Download Page’ button at the top. Once there, follow Steps 4 and 5 to copy the link.
Step-by-Step:
Step 1: From the Sites tab at the top of the page, click the property that you would like to access the 3D links for. This will take you to the Site Summary page.
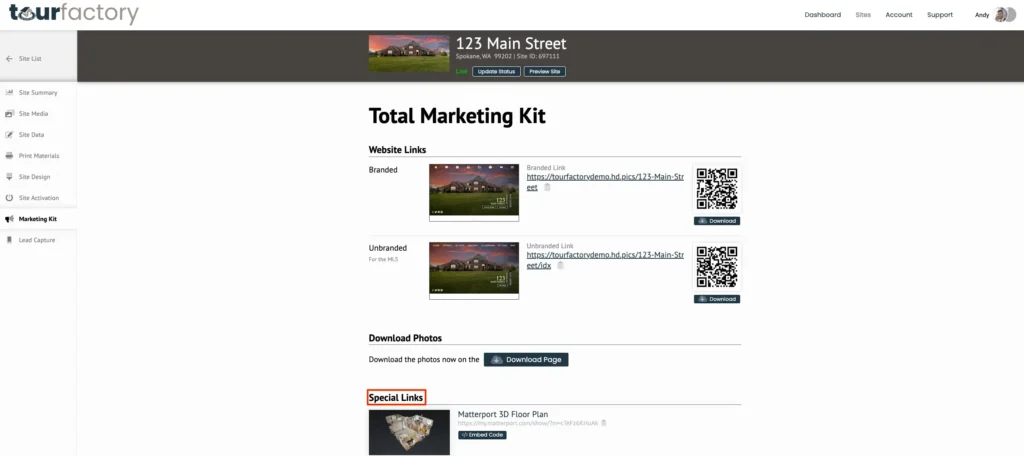
Step 2: From the Site Summary page, navigate to the Marketing Kit tab
Step 3: Scroll down to the ‘Special Links’ section to see your embedded media (3D links, Vimeo videos, etc.).
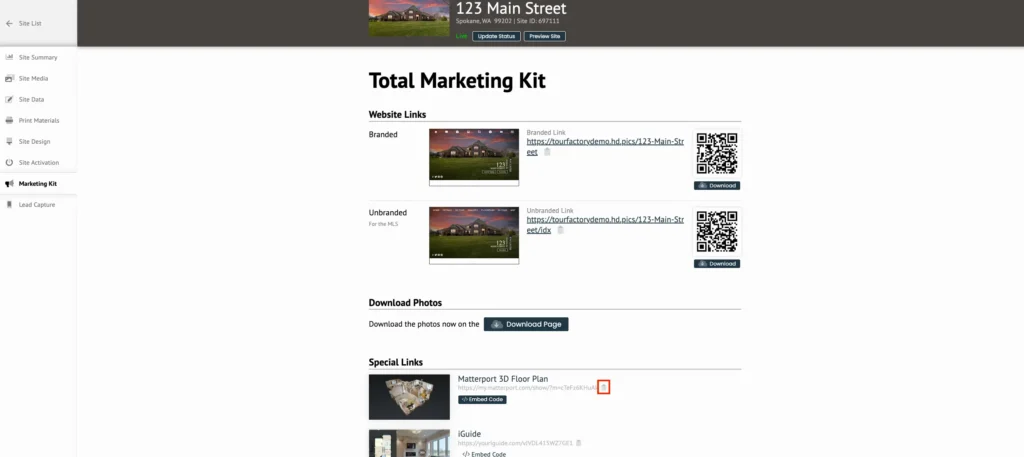
Step 4: Clip the clipboard icon to the right of the partial URL to copy the link.
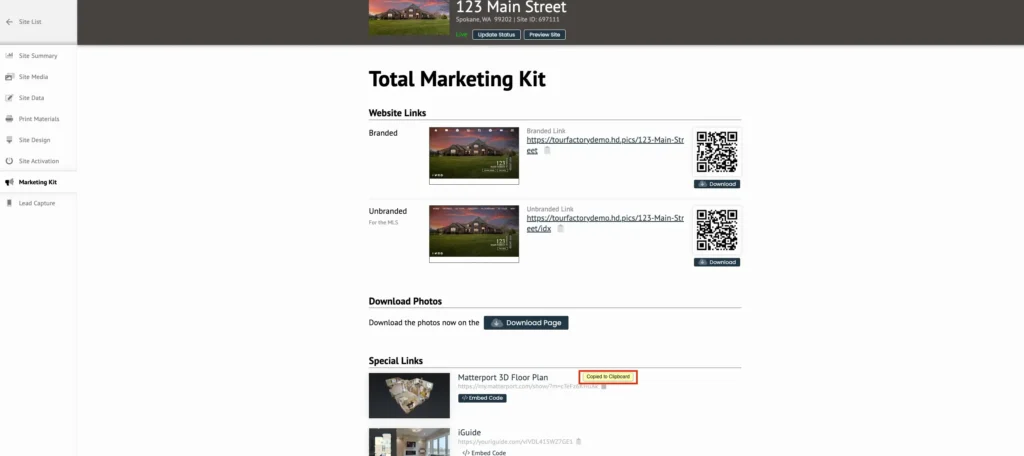
Step 5: A yellow ‘Copied to Clipboard’ pop-up will confirm that the link has been copied and is ready to paste.
Related Content
Add a Display Condition
Property Site
How to Add a Display Condition Step 1: Go to the Site Summary Step 2: Click the Site Design tab Step 3: Select ‘Add A Display Condition’ Step 4: Choose…
How to Add/Change Music for your Property Site: Step 1: Go to Site Summary Step 2: Click the Site Design tab Step 3: Click ‘Select Background Music’ button Step 4:…
Step 1: Go to the Site Summary for the property. You can get there by clicking the Sites tab at the top of the page and searching the property address. Once you click on the property, you will be taken to the Site Summary.
Step 2: Click the Site Media tab on the left-hand side of the page.
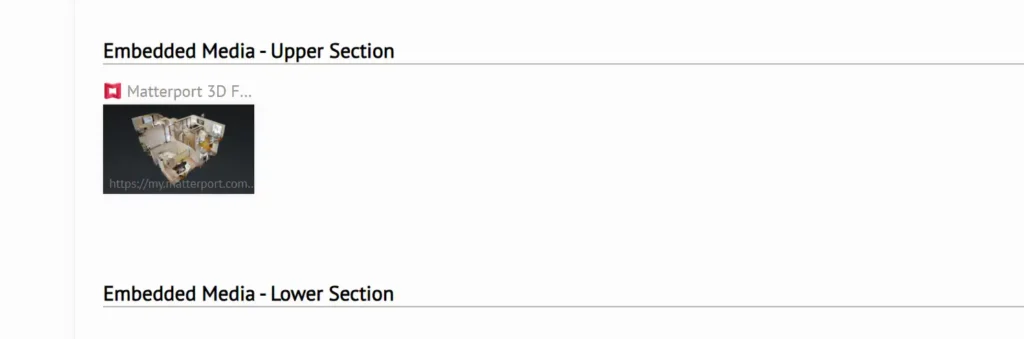
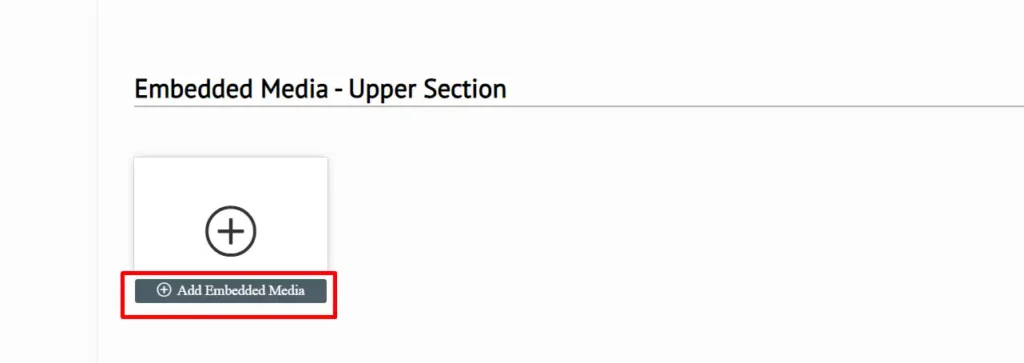
Step 3: Scroll down to the bottom of the page where you will see the Embedded Media sections, Upper and Lower. Note: the difference between the two sections is that Upper will appear just above the property description on the property website and Lower will appear just below the property description.
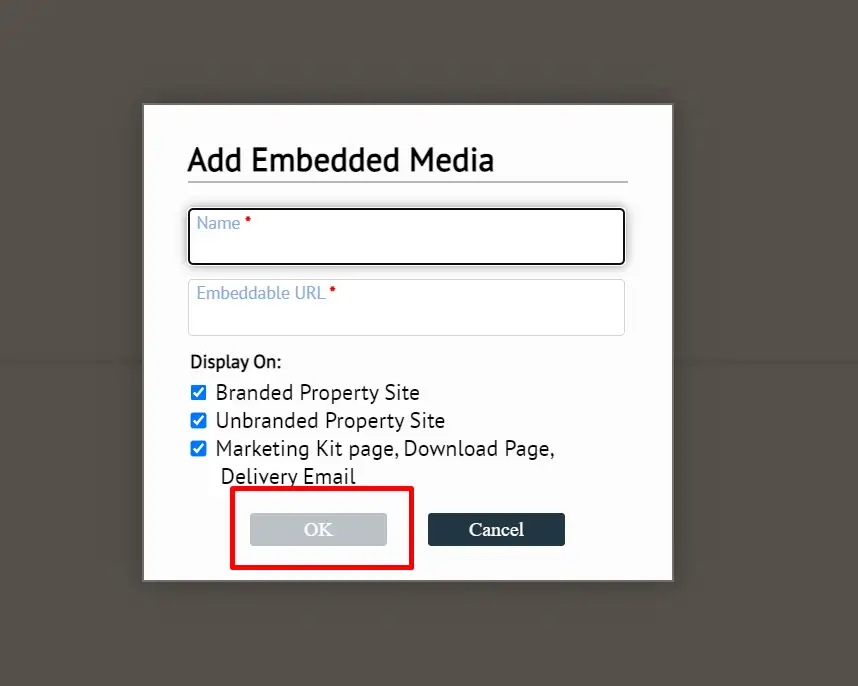
Step 4: Click the “Add Embedded Media” button in your desired section. You will get a small pop-up window.
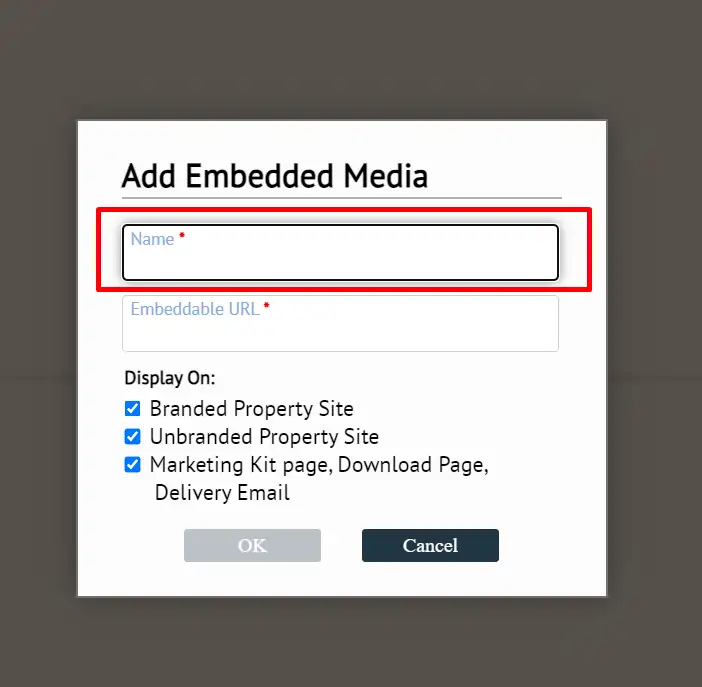
Step 5: In the “Name” box, enter in a name for your media. This could be something like “Branded Video” or “Unbranded 3D Floor Plan”.
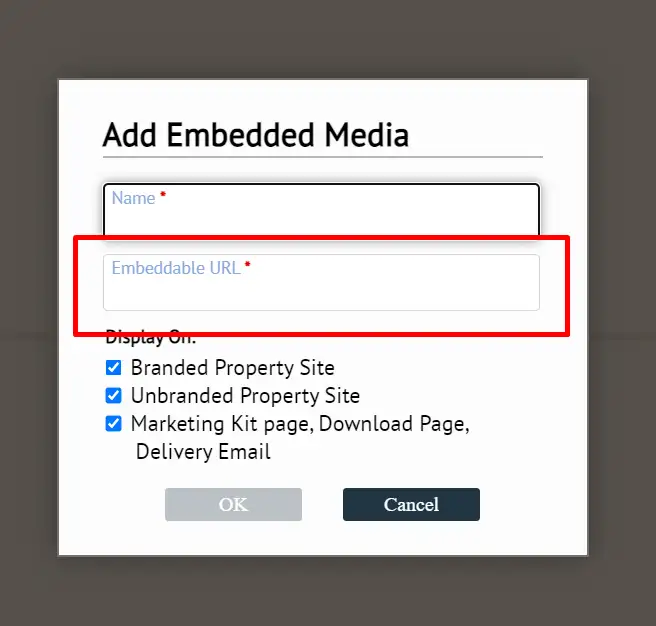
Step 6: In the Embeddable URL box, enter in the URL for the media that you would like to add. This could be a Youtube or Matterport link. If you have uploaded a video file to the Site Media already, you will see a “Content to Embed” drop-down. If you click that, you can switch from the Web Page URL option to the video that is in the Site Media.
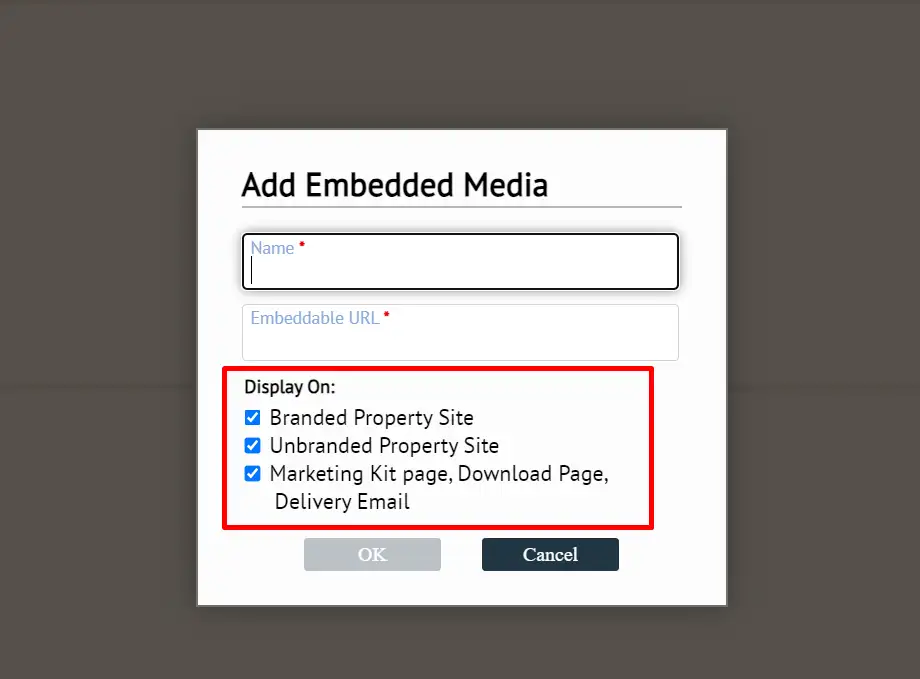
Step 7: Once you have entered in your URL, you will have the option to choose which site pages you would like that displayed on. In the Display On area, you can choose to display your media on the Branded Property Site, the Unbranded Property Site, the Marketing Kit Page/Download Page/Delivery Email, or all three. Note: this is extremely helpful when you have a branded video that you won’t want to be displayed on the unbranded property site!
Step 8: Click the “Ok” button to save your changes and embed your media to the property website.
Related Content
Add a Display Condition
Property Site
How to Add a Display Condition Step 1: Go to the Site Summary Step 2: Click the Site Design tab Step 3: Select ‘Add A Display Condition’ Step 4: Choose…
How to Add/Change Music for your Property Site: Step 1: Go to Site Summary Step 2: Click the Site Design tab Step 3: Click ‘Select Background Music’ button Step 4:…